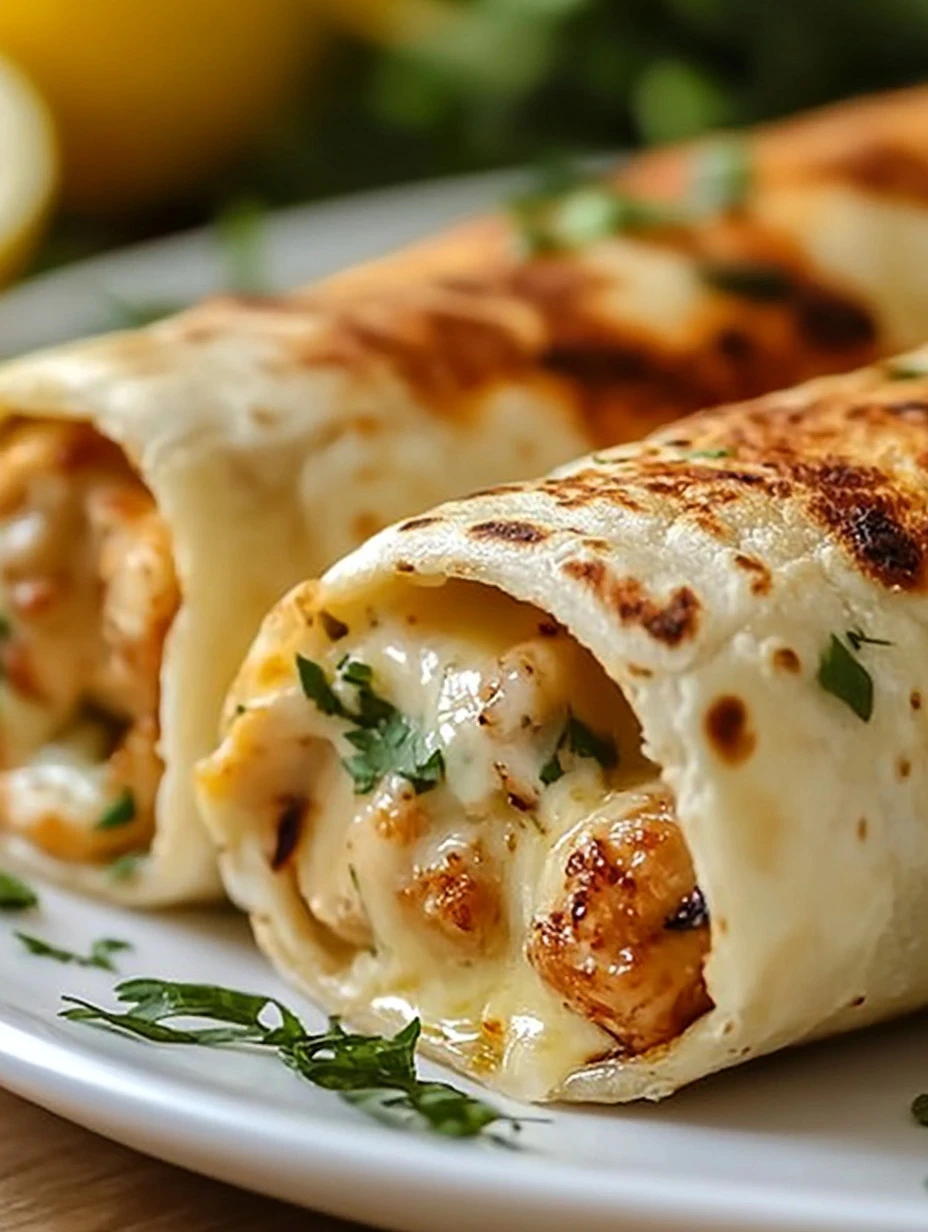
Every time I make Cheesy Garlic Chicken Wraps, it takes me back to warm summer evenings on the porch, surrounded by my loved ones. There’s something incredibly comforting about the aroma of garlic sizzling in butter that fills the kitchen, wrapping you in a hug of deliciousness. I remember when I first whipped up this recipe. The kids were running in from outside, laughter echoing through the house as they caught the delightful scent wafting through the air. They didn’t even wait for dinner to dig in, and honestly, that’s one of the greatest compliments I could ask for! This recipe is not only a household favorite, but it also brings everyone together, sparking conversations and creating beautiful memories around the dinner table. I know that once you try it, you’ll feel that same warmth and comfort in your home. Let’s dive in and make these wraps together!
How to Make Cheesy Garlic Chicken Wraps
Ingredients:
- 2 chicken breasts, grilled and sliced: This is where the protein and heart of the dish come from. Grilling gives the chicken a smoky flavor that pairs perfectly with the garlic.
- 4 whole wheat wraps: These wraps provide the vehicle for all that tasty filling. I prefer whole wheat for a bit of extra texture and nutrition, but you can use your favorite type.
- 1 cup shredded mozzarella cheese: Can you say melted goodness? This cheese adds that gooey stretchiness we all love in a wrap. Remember, fresh mozzarella gives the best flavor!
- 2 tablespoons butter: This adds richness and helps to sauté the garlic beautifully.
- 4 cloves garlic, minced: Garlic is the star ingredient here, bringing that incredible aroma and flavor that makes this dish unforgettable.
- 1 tablespoon olive oil: This works alongside the butter to ensure the garlic doesn’t burn and brings a lovely depth of flavor.
- 1 tablespoon fresh parsley, chopped: Fresh herbs brighten the dish and offer a burst of color on the plate.
- Salt and pepper to taste: Seasoning is key! You want to enhance the flavors without overpowering them.
I love adding fresh herbs like rosemary—it makes the chicken smell and taste amazing! You can also try adding spinach or other veggies into the wraps, depending on what you have on hand. Don’t be afraid to get creative!
Cooking Steps:
-
Start by preparing your chicken: If you have leftover grilled chicken, then you’re in luck! If not, you can grill or pan-cook fresh chicken breasts. Make sure they’re cooked through and slice them thinly for easy wrapping.
-
Heat the olive oil: In a large skillet, heat the olive oil over medium heat until it shimmers just a bit. You want to make it hot enough to cook the garlic without burning it—that’s important for getting the right flavor.
-
Sauté the garlic: Toss in the minced garlic. Oh, the smell! Sauté for about a minute, just until the garlic becomes fragrant. You really want to keep an eye on it; burnt garlic can taste quite bitter, and nobody wants that in their wraps.
-
Add the butter: Once the garlic is fragrant, add the butter. Let it melt completely, then mix it with the garlic. This combination is where the magic really happens.
-
Introduce the chicken: Next, toss in your grilled chicken slices. Cook for a few minutes, letting the chicken soak up all that buttery, garlicky goodness. Season with a pinch of salt, pepper, and parsley.
-
Lay out the wraps: While that’s cooking, prepare your whole wheat wraps. I like to lay them out on the counter so I can assemble them easily.
-
Fill the wraps: Once the chicken is coated in that lovely garlic butter mixture, it’s time to assemble. Spoon a generous amount of the chicken mixture onto each wrap.
-
Add the cheese: Don’t be shy! Sprinkle a good amount of shredded mozzarella on top of the chicken. I love seeing how it melts while cooking.
-
Roll it up: Start by folding the sides of the wrap inward and then roll it up tightly from the bottom. You want to make sure it stays packed together for grilling.
-
Grill the wraps: Heat the skillet back up to medium heat and place the wraps seam-side down. Grill them for about 3-4 minutes on each side until they turn golden brown and crispy. Trust me, it’s worth the wait.
-
Slice and serve: Once they’re perfectly crispy, slice them in half. I love to serve them with a side salad or some zesty dip to balance the richness.
-
Garnish: For an extra touch, sprinkle some more fresh parsley on top before serving. It’s that little detail that makes a big difference!
Why I Love Making This Dish:
Cheesy Garlic Chicken Wraps are special to me because they represent more than just a meal; they symbolize family gatherings and cherished moments. I remember the first time I cooked this dish for my grandchildren—they couldn’t get enough! Their little faces lit up with joy, and that alone makes me happy. The satisfaction of preparing something wholesome and tasty for my family is what drives my love for cooking. Plus, the cleanup is pretty simple, which is a blessing!
What You’ll Need:
To make this recipe, you don’t need any fancy equipment—just a good skillet, a cutting board, and a sharp knife. I like using a spatula to turn the wraps, but you can also use tongs if that’s your preference. Make sure you have a sturdy plate ready to hold your delicious creations after they’re cooked!
Tips for Perfect Results:
- Don’t rush the garlic: As tempting as it is to cook everything quickly, patience is key. Let the garlic sauté slowly for the best flavor.
- Watch the wraps: Keep an eye on your wraps as they grill. You want them crispy on the outside without burning them. If they’re looking too dark, lower the heat a notch.
- Experiment with fillings: If you have leftover veggies or even a few bits of cooked bacon, throw them in the wraps! It’s a great way to use up what you have while keeping it delicious.
Serving Suggestions and Sides:
These wraps are delicious on their own, but serving them with a fresh garden salad dressed in a light vinaigrette can make the meal feel even more satisfying. You could also pair them with a heated marinara sauce for dipping or a tangy yogurt sauce to cool things down. Personally, I love a side of roasted veggies; the sweetness of the roasted carrots and bell peppers highlights the savory wraps perfectly.
Leftovers:
If you have any leftovers (which is rare in my house), you can store them in an airtight container in the fridge for up to three days. To reheat, I recommend using the oven or air fryer to keep that crispiness intact. Just pop them back in at 350°F for about 10 minutes so that they’re warm and ready to enjoy again.
FAQ Section:
Can I use boneless chicken?
You can, but trust me, the bone-in version is so much more flavorful. I’ve tried both, and bone-in is always juicier! If you opt for boneless, just watch the cooking time, as it will be quicker.
Can I make these wraps ahead of time?
Absolutely! You can prepare the chicken and filling in advance and then assemble and grill the wraps when you’re ready to eat. Perfect for busy nights!
What if I don’t have mozzarella cheese?
That’s okay! You can substitute any cheese you like, such as cheddar or even pepper jack for a spicy kick. Just remember, different cheeses melt differently, so keep an eye on them while grilling.
Can I add vegetables to the wraps?
Oh, yes! Things like sautéed spinach, roasted red peppers, or even diced tomatoes can add great flavor and texture. Don’t hesitate to get creative!
Can these wraps be frozen?
Yes! After grilling, let them cool completely. Then wrap them tightly in foil and freeze. When you’re ready, reheat them in the oven until hot. It’s a great meal prep option.
This dish has become a favorite in my house, and I’m so excited for you to try it. I know you’ll love it as much as I do! With every bite of those cheesy, garlicky goodness wrapped in soft, warm tortillas, you’ll feel that comforting hug that only good food can provide. Let me know how it turns out for you, and if your family asks for seconds, just like mine does every time. Happy cooking!
Cheesy Garlic Chicken Wraps
Ingredients
Main Ingredients
- 2 pieces chicken breasts, grilled and sliced Grilling gives the chicken a smoky flavor.
- 4 pieces whole wheat wraps Whole wheat for extra texture and nutrition.
- 1 cup shredded mozzarella cheese Fresh mozzarella gives the best flavor.
- 2 tablespoons butter Adds richness to the dish.
- 4 cloves garlic, minced Star ingredient, brings incredible flavor.
- 1 tablespoon olive oil Prevents garlic from burning.
- 1 tablespoon fresh parsley, chopped Adds brightness and color.
- to taste salt and pepper Season to enhance flavors.
Instructions
Preparation
- Prepare your chicken by grilling or pan-cooking until cooked through, then slice thinly.
- Heat the olive oil in a large skillet over medium heat until it shimmers.
- Add minced garlic to the skillet and sauté for about a minute until fragrant.
- Add the butter and let it melt completely while mixing with the garlic.
- Introduce the grilled chicken slices to the skillet and cook for a few minutes, seasoning with salt, pepper, and parsley.
- Lay out the whole wheat wraps on the counter for easy assembly.
- Spoon a generous amount of chicken mixture onto each wrap.
- Sprinkle shredded mozzarella on top of the chicken.
- Fold the sides of the wrap inward and roll tightly from the bottom.
- Heat the skillet again over medium heat and grill the wraps seam-side down for about 3-4 minutes on each side until golden brown and crispy.
- Once crispy, slice the wraps in half and serve.
- Garnish with more fresh parsley before serving.