How to Make the Juiciest Cherry Pie Bars That’ll Wow Everyone!
Every time I make these Cherry Pie Bars, I’m whisked back to warm summer afternoons spent with my grandmother in her cozy kitchen. The aroma of sweet cherries bubbling with the hint of buttery crust filled the air, making every bite a little taste of nostalgia. This dessert isn’t just a recipe; it’s a delightful memory wrapped in layers of flavor, and I know that once you try it, you’ll feel the same warmth and comfort! Let’s dive into this wonderful recipe together and create something special that you can share with your loved ones.
Ingredients
Here’s what you’ll need to whip up these scrumptious Cherry Pie Bars. Each ingredient plays a vital role in creating that perfect balance of tart and sweet.
| Ingredient | Amount |
|---|---|
| All-purpose flour | 2 cups |
| Powdered sugar | 1/2 cup |
| Unsalted butter (softened) | 1 cup |
| Salt | 1/4 teaspoon |
| Pitted and halved cherries | 2 cups |
| Granulated sugar | 1/2 cup |
| Cornstarch | 1 tablespoon |
| Lemon juice | 1 tablespoon |
| Powdered sugar (for glaze) | 1 cup |
| Milk | 2 tablespoons |
| Vanilla extract | 1 teaspoon |
I particularly love using fresh, ripe cherries for this recipe. If you can’t find fresh ones, feel free to swap them with frozen cherries. Just make sure to drain any excess liquid!
Why I Love Making This Dish
Cherry Pie Bars hold a special place in my heart. They remind me of family gatherings, where everyone suddenly turns into a chef, sharing tips and stories over delicious treats. I love watching my family’s eyes light up as they take the first bite, and hearing their praises fills my heart with joy.
What You’ll Need
Before we jump into the step-by-step guide, let’s gather everything you’ll need. Here are a few tools that will make your baking adventure smooth:
- A 9×13 inch baking dish (to hold all that yummy goodness)
- Mixing bowls (for your dry and wet ingredients)
- A measuring cup and spoons (to ensure everything is perfectly proportioned)
- A spoon or spatula (to mix and spread)
- An oven (of course!)
Tip: Always preheat your oven first; this ensures a perfectly baked crust.
Step-by-Step Guide
1. Preheat the Oven
First things first, preheat your oven to 350°F (175°C). Trust me, this is key for that lovely golden crust!
2. Prepare Your Baking Dish
Grease your 9×13 inch baking dish so that the bars won’t stick. You can use butter or cooking spray—a simple step that makes a big difference!
3. Make the Crust Mixture
In a large mixing bowl, combine 2 cups of all-purpose flour, 1/2 cup of powdered sugar, 1 cup of softened unsalted butter, and 1/4 teaspoon of salt. Use a fork or your hands to mix everything until it resembles a crumbly texture. This is going to form the base and topping of your bars, so take your time!
4. Press the Crust Into the Dish
Take about two-thirds of your crumbly mixture and press it firmly into the bottom of the greased baking dish. You want a nice even layer—this will be the foundation of our cherry treasure!
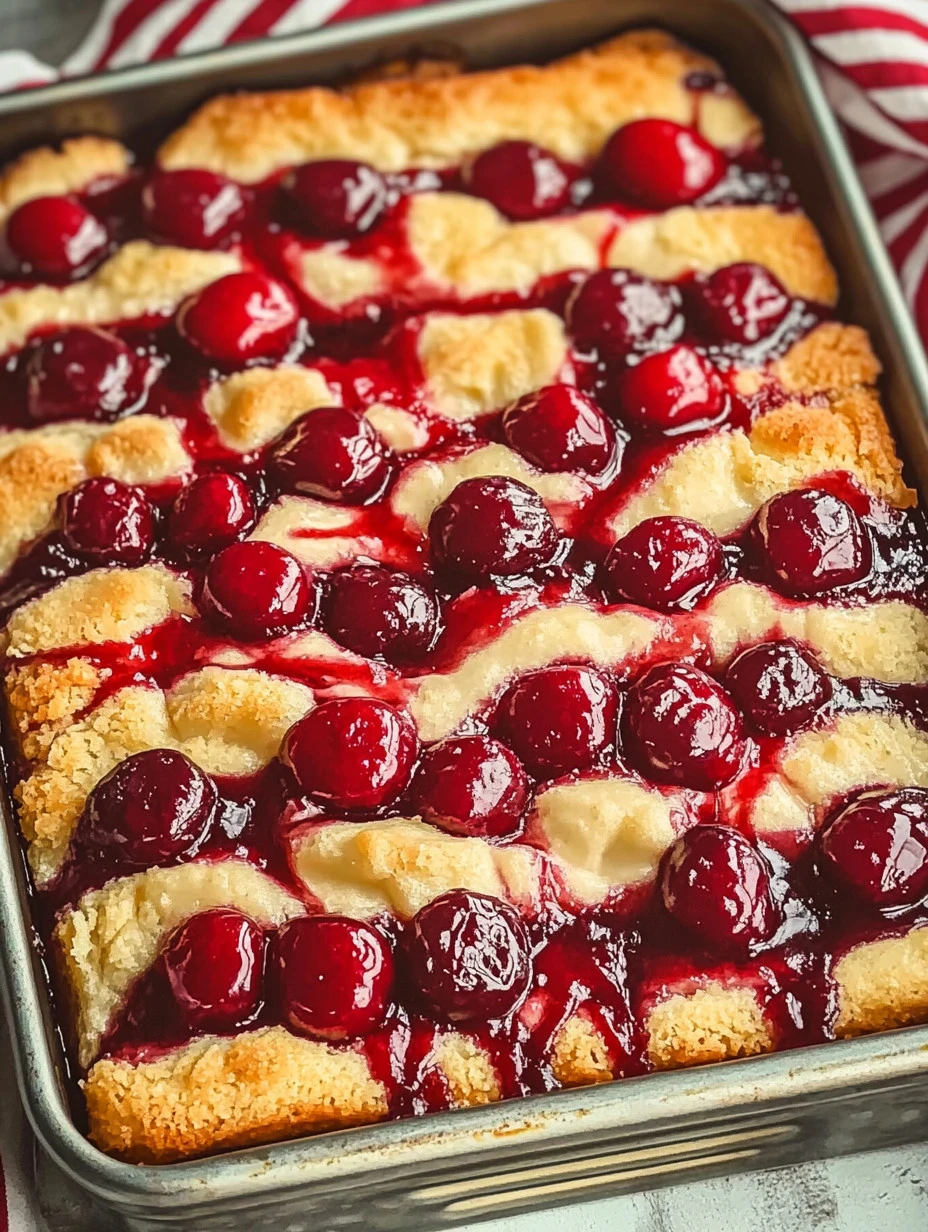
5. Prepare the Cherry Filling
In another bowl, combine your 2 cups of pitted and halved cherries with 1/2 cup of granulated sugar, 1 tablespoon of cornstarch, and 1 tablespoon of lemon juice. Toss everything together gently. The cornstarch helps thicken the juices, creating a gooey goodness that you won’t be able to resist.
6. Spread the Cherry Mixture
Pour the cherry mixture evenly over the crust. Don’t be shy; get every last cherry out of that bowl!
7. Crumble the Remaining Crust on Top
Now, take the remaining crumbly mixture and sprinkle it over the cherry filling. This will create a beautiful topping that balances the tart cherries!
8. Bake to Perfection
Place the baking dish in the preheated oven and bake for about 35-40 minutes or until the top is golden brown. Your kitchen will start to smell absolutely divine during this time!
9. Cool Down
Once your bars are baked to perfection, take them out and let them cool completely. This step is super important if you want clean cuts when you slice them.
10. Make the Glaze
While the bars are cooling, let’s whip up the glaze! In a small bowl, mix together 1 cup of powdered sugar, 2 tablespoons of milk, and 1 teaspoon of vanilla extract until it’s silky smooth.
11. Drizzle It On
Once the bars have cooled, drizzle the glaze over the top. This adds that sweet finishing touch that everyone will love!
12. Slice and Serve
Now it’s time to slice these beauties into squares! Serve them warm or at room temperature, and watch your friends and family eagerly dig in.
Tips for Perfect Results
Chilling the Butter: If you forget to take your butter out in advance, you can cut it into small cubes and put it in the microwave for just a few seconds to soften it. This can save you some time!
Thicker Cherry Layer: If you want filling that’s bursting with cherries, feel free to increase the amount slightly—just make sure not to overfill!
Make Ahead: These bars are great for making ahead of time. Just keep them covered at room temperature for a couple of days, or store them in the fridge if you want them to last longer.
Serving Suggestions and Sides
I think these Cherry Pie Bars are best enjoyed on their own, but you could serve them with a scoop of vanilla ice cream for a truly indulgent dessert. Maybe even a dollop of whipped cream? You can never go wrong with that!
Leftovers
If you happen to have leftovers (which is pretty unlikely, trust me), store them in an airtight container at room temperature for up to a few days. If you choose to refrigerate them, just be sure to allow them to come to room temperature before serving again—they taste even better when they’re slightly warm!
FAQ Section
Can I use frozen cherries?
Absolutely! Just make sure to thaw and drain any excess liquid before using them in the recipe. This will help keep your bars from getting soggy.
What if I don’t have cornstarch?
You can substitute cornstarch with all-purpose flour, but I find that cornstarch gives a nicer, thicker consistency.
Can I use different fruits?
Yes! Feel free to experiment with fruits like blueberries, raspberries, or even peaches. Just adjust the sugar depending on the sweetness of the fruit you’re using.
Conclusion
I can’t tell you how excited I am for you to try these Cherry Pie Bars! They have a way of bringing everyone together, creating lasting memories around the table. This dish has become a family favorite in my house, and I know you’ll love it as much as I do!
So why not gather your ingredients, turn on that oven, and let’s bake something sweet together? I’d love to hear how they turn out for you—drop me a comment to let me know your thoughts! If your family asks for seconds, just like mine does every time, you’ll know you’ve hit the jackpot! Happy baking!

Cherry Pie Bars
Ingredients
For the crust
- 2 cups all-purpose flour
- 1/2 cup powdered sugar
- 1 cup unsalted butter (softened) Must be softened for easy mixing.
- 1/4 teaspoon salt
For the filling
- 2 cups pitted and halved cherries Fresh or frozen cherries can be used.
- 1/2 cup granulated sugar
- 1 tablespoon cornstarch Can substitute with all-purpose flour if needed.
- 1 tablespoon lemon juice
For the glaze
- 1 cup powdered sugar
- 2 tablespoons milk
- 1 teaspoon vanilla extract
Instructions
Preparation
- Preheat your oven to 350°F (175°C).
- Grease your 9x13 inch baking dish.
- In a large mixing bowl, combine flour, powdered sugar, softened butter, and salt until the mixture resembles a crumbly texture.
- Press about two-thirds of the crumbly mixture into the bottom of the prepared baking dish.
- In another bowl, mix cherries, granulated sugar, cornstarch, and lemon juice.
- Spread the cherry mixture over the crust evenly.
- Sprinkle the remaining crumbly mixture over the cherry filling.
- Bake for 35-40 minutes or until the top is golden brown.
- Let it cool completely before slicing.
- Mix powdered sugar, milk, and vanilla for the glaze and drizzle over the cooled bars.
- Slice into squares and serve.