
Every time I make these Christmas Sugar Cookies, my heart fills with warmth and nostalgia. I can vividly remember when I first baked them with my grandmother in her cozy kitchen, surrounded by the aroma of buttery goodness and sweet sprinkles. Those afternoons spent rolling dough and draping sprinkles over our creations are some of my cherished holiday memories. It’s funny how a simple cookie can evoke such strong emotions, isn’t it? When you take the first bite, the soft and chewy texture melts in your mouth, and I promise you’ll feel that same comfort and joy. Trust me, you’re going to love this recipe as much as I do!
How to make Christmas Sugar Cookies
Ingredients:
To get started, let’s gather everything you need. These Christmas Sugar Cookies are delightful because each ingredient plays an essential role in creating their signature flavor and texture.
- 2 3/4 cups all-purpose flour: This is the backbone of the cookie, giving it structure.
- 1 teaspoon baking soda: This ingredient helps the cookies to rise beautifully, ensuring a soft texture.
- 1/2 teaspoon baking powder: This adds a little extra lift, making the cookies nice and fluffy.
- 1 cup unsalted butter, softened: Butter is vital for that rich flavor and a chewy texture. Make sure it’s softened to room temperature for easy mixing.
- 1 1/2 cups white sugar: This sweetened delight adds the perfect amount of sweetness and contributes to that lovely golden color.
- 1 egg: Eggs are essential for binding the ingredients together.
- 1 teaspoon vanilla extract: Ah, the aroma! Vanilla adds a lovely depth of flavor that makes these cookies feel special.
- 1/2 teaspoon almond extract: This little addition elevates the flavor to a whole new level; trust me, it’s worth it!
- 3/4 teaspoon salt: Just a pinch of salt enhances all the sweet flavors.
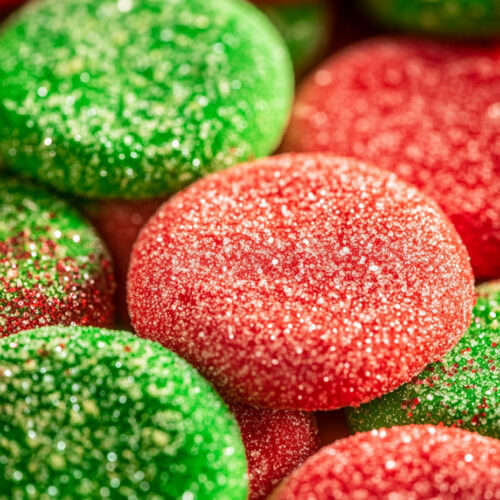
- Red and green sprinkles: The icing on the cake — or, in this case, the sprinkles on the cookies! They add a festive touch that makes these treats perfect for Christmas.
Cooking Steps
Step 1: Preheat Your Oven First things first, preheat your oven to 375°F (190°C). Trust me, this is key for a perfectly baked cookie. You want it nice and toasty before you pop those cookies in.
Step 2: Mix Dry Ingredients In a small bowl, combine the flour, baking soda, and baking powder. Give it a good stir so the ingredients are well mixed. I always like to whisk these together to ensure there are no clumps—everything should blend together smoothly, making for a perfect cookie dough!
Step 3: Cream Butter and Sugar In a large bowl, use a mixer to cream together the softened butter and sugar until it’s light and fluffy. This step is crucial as it adds air to the mixture, making your cookies light and delicate. It’ll take about 3-4 minutes until it looks beautifully creamy.
Step 4: Add in Egg and Extracts Next, beat in the egg, vanilla extract, and almond extract. I can already smell the sweetness as I mix these in! It’s important to mix until everything is well blended.
Step 5: Combine Wet and Dry Ingredients Now, gradually blend in the dry ingredients into the wet mixture. I find it helpful to do this in thirds. This way, your mixture won’t be too hard to stir, and everything combines nicely without flour flying everywhere!
Step 6: Roll the Dough Once the dough is all mixed together, it’s time to get your hands a little messy. Roll rounded teaspoonfuls of the dough into balls. I usually like to make them a little larger than a teaspoon for a good-sized cookie.
Step 7: Place on Baking Sheets Place the cookie balls on ungreased cookie sheets, making sure to leave enough space in between them. They’ll spread out as they bake, and you don’t want them to touch each other.
Step 8: Flatten and Sprinkle Gently flatten each cookie ball slightly with your fingers, then sprinkle a generous amount of red and green sprinkles on top. This part is so much fun! You can get creative with how much you want to add.
Step 9: Bake Pop those trays into the oven and bake for about 8 to 10 minutes. You’ll know they’re ready when they’re just starting to turn a light golden color around the edges. Keep an eye on them because every oven is a little different!
Step 10: Cool Down Once they’re done baking, let them cool on the cookie sheets for a couple of minutes before transferring them onto wire racks. This waiting time is crucial; it helps solidify the cookies without breaking them.
Why I Love Making This Dish
There’s something incredibly special about making Christmas Sugar Cookies. For me, it’s not just about the delicious taste; it’s about the memories and the love that goes into each batch. I enjoy sharing them with family and friends, and they quickly become a holiday tradition in my house. There’s always laughter and joy as we decorate them, and the sprinkles add such a festive touch!
What You’ll Need
Before you dive into making these delightful cookies, here are a few tools you might want to gather:
- Mixing bowls: A large one and a small one for the dry ingredients
- A mixer: This will make creaming the butter and sugar so much easier!
- Cookie sheets: I recommend using ungreased ones for that perfect bake.
- A cookie scoop or spoon: To measure out your dough.
- Wire racks: Essential for cooling down your cookies to perfection.
Step-by-Step Guide
- Preheat the oven to 375°F.
- In one bowl, mix flour, baking soda, and baking powder.
- In another bowl, cream butter and sugar.
- Beat in egg and extracts until combined.
- Gradually add in the dry mix, combining well.
- Roll dough into balls and place on cookie sheets.
- Slightly flatten and sprinkle on your festive decorations.
- Bake for 8 to 10 minutes until golden.
- Cool on cookie sheets before transferring to racks.
Tips for Perfect Results
To make sure your Christmas Sugar Cookies turn out perfectly, here are my personal tips:
- Make sure your butter is at room temperature. I often leave mine out for a little while before starting.
- Don’t overmix the dough; just blend until combined. Overworking can lead to tough cookies.
- Experiment with the sprinkles! You can use colored sugar or even festive shaped sprinkles for more fun.
- If you find the dough too sticky, don’t hesitate to add a little more flour. Just remember to do it in small increments.
Serving Suggestions and Sides
These cookies are delicious on their own, but they can also be paired with a warm cup of cocoa or a glass of milk. You can even turn these cookies into a fun dessert platter diverse with other treats like gingerbread cookies or peppermint bark. Sharing this platter during the holidays is always a hit with family.
Leftovers
Storing your Christmas Sugar Cookies is a breeze! If you have any leftovers, keep them in an airtight container at room temperature. They stay fresh for about a week. If you want to prolong their life, you can freeze them. Just make sure to place parchment paper between layers to prevent sticking.
Emotional Engagement
I can’t help but smile when I think about how thrilled my family is when they see these cookies fresh out of the oven. The moment I tell them I’ve made a batch, it’s as if I’ve announced dessert for dinner! When I made these cookies for my neighbors last year, they couldn’t stop raving about them. It’s the little things that make the holidays so special, and I know you're going to create your own memories while baking these.
FAQ Section
Can I use a different type of flour? Yes, you can! While all-purpose flour works best, you can substitute it with gluten-free flour blends if needed. Just make sure to check the blend for proper ratios!
Can I make this dough ahead of time? Absolutely! You can prepare the dough and store it in the refrigerator for up to 3 days. Just make sure it’s well wrapped, and you might want to let it sit out for a few minutes to soften before rolling.
What should I do if my cookies spread too much? If your cookies spread too thin, next time you can try chilling the dough for about 30 minutes before baking. This helps them keep their shape!
Conclusion
Baking these Christmas Sugar Cookies has become a delightful tradition in my home. I get so excited every holiday season to share this recipe with all of you, knowing it brings joy and creates memories just like it did for me. I hope you give this recipe a try and experience the warmth and love that comes with each bite. Let me know how they turn out, and if your family asks for seconds, just like mine does, well, that’s a true sign of a fantastic recipe! Happy baking, dear friends!
Christmas Sugar Cookies
Ingredients
Dry Ingredients
- 2 3/4 cups all-purpose flour This is the backbone of the cookie, giving it structure.
- 1 teaspoon baking soda Helps the cookies to rise beautifully.
- 1/2 teaspoon baking powder Adds a little extra lift for fluffiness.
- 3/4 teaspoon salt Enhances the sweetness of the cookies.
Wet Ingredients
- 1 cup unsalted butter, softened Vital for the rich flavor and chewy texture.
- 1 1/2 cups white sugar Adds sweetness and contributes to the golden color.
- 1 egg Essential for binding the ingredients together.
- 1 teaspoon vanilla extract Adds a lovely depth of flavor.
- 1/2 teaspoon almond extract Elevates the flavor to a whole new level.
Decorations
- red and green sprinkles Add a festive touch perfect for Christmas.
Instructions
Preparation
- Preheat your oven to 375°F (190°C).
- In a small bowl, combine the flour, baking soda, and baking powder. Stir to mix.
- In a large bowl, cream the softened butter and sugar until light and fluffy (about 3-4 minutes).
- Beat in the egg, vanilla extract, and almond extract until well blended.
- Gradually blend the dry ingredients into the wet mixture in thirds.
- Roll rounded teaspoonfuls of the dough into balls.
- Place the cookie balls on ungreased cookie sheets, leaving space between them.
- Flatten each cookie ball slightly with your fingers and sprinkle with red and green sprinkles.
Baking
- Bake the cookies for about 8 to 10 minutes until they are just starting to turn a light golden color.
- Let them cool on the cookie sheets for a couple of minutes before transferring to wire racks.