Every time I make this Air Fryer Parmesan Crusted Chicken, it reminds me of those cozy Sunday dinners with family gathered around the table. The mouthwatering aroma fills the kitchen, and I can’t help but smile as I think of my kids running around, excited to dig into a delicious meal. It’s one of those recipes that blend comfort and delight perfectly, and I know once you try it, you’ll feel that warm embrace too!
So, let’s get started on making this scrumptious dish that’s not just easy to whip up but will surely make your family ask for seconds!
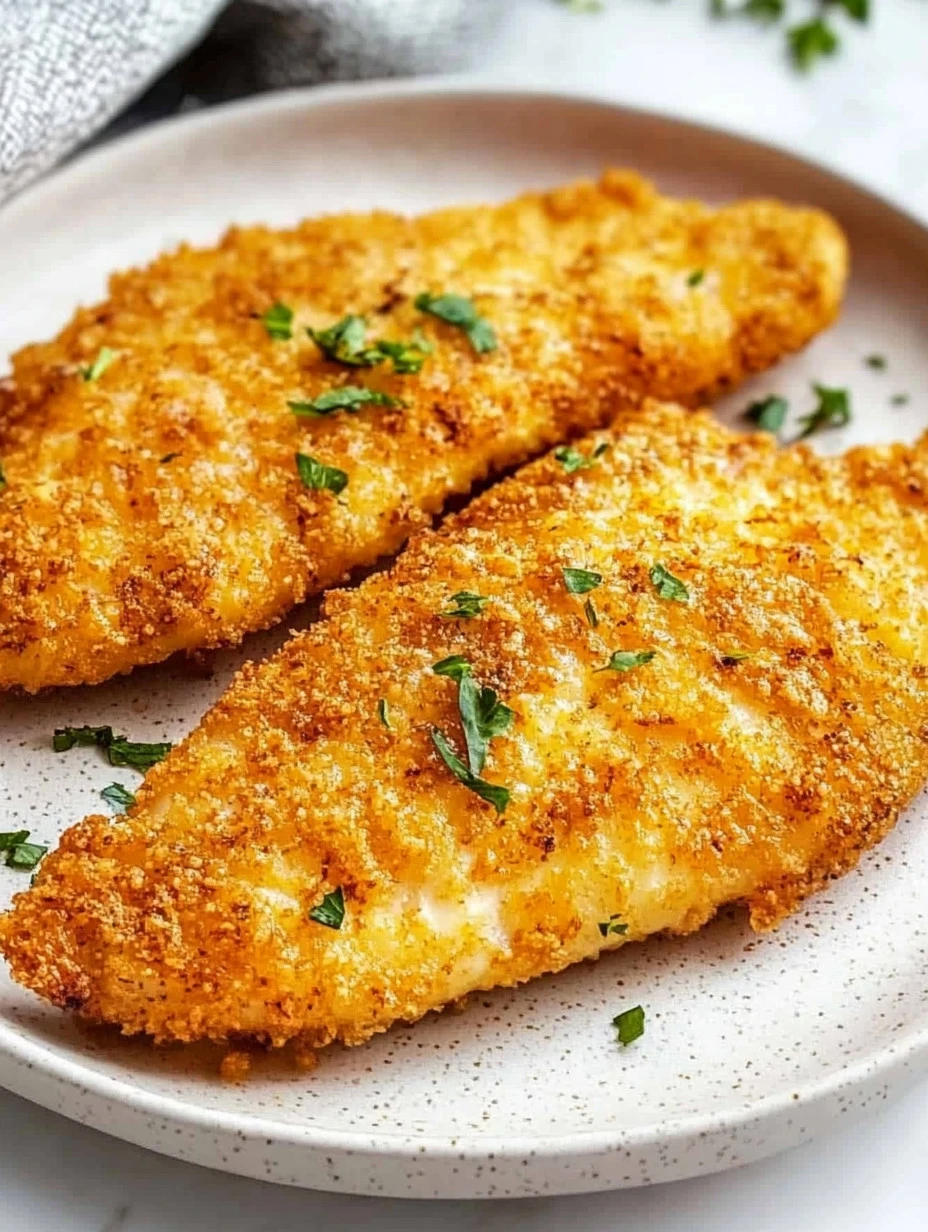
How to make Air Fryer Parmesan Crusted Chicken
Ingredients:
- 2 chicken breasts boneless, skinless: These are the stars of our dish, and using boneless, skinless breasts keeps it simple and healthy.
- 1/4 cup mayonnaise: This adds moisture and helps the coating stick perfectly.
- 1/3 cup parmesan cheese freshly grated: Oh, the flavor! It brings a lovely nuttiness that takes the chicken to another level.
- 1/3 cup Panko breadcrumbs: These give that delightful crunch that makes it feel like you’ve deep-fried it, without all the oil.
- 1/4 tsp garlic powder: Just a hint of garlic flavor to brighten everything up.
- 1/4 tsp Italian seasoning: This blend captures the essence of Italian dishes—herby and aromatic.
- 1/2 tsp paprika: For a bit of warmth and color.
- 1/2 tsp black pepper freshly ground: To add a touch of spiciness.
- 1/4 tsp sea salt (adjust to taste): Don’t forget to season well; it makes a world of difference!
Personal note: I love adding fresh herbs like rosemary or thyme to the marinade for extra flavor—it makes the chicken smell and taste amazing!
Cooking Steps:
-
Prepare Your Chicken: Start by slicing each chicken breast horizontally into two halves. I find that this helps them cook evenly and allows more surface area for that delightful crust!
-
Dry and Spread: Pat the chicken dry with paper towels. This step is really important to get that crispy exterior. Then, spread the mayonnaise evenly on both sides of the chicken. You’re going to love how wonderfully creamy it is!
-
Mix the Coating: In a wide and shallow bowl, combine the Parmesan, Panko breadcrumbs, garlic powder, Italian seasoning, paprika, black pepper, and sea salt. Mix everything together well—this is where all that flavor comes from!
-
Dredge the Chicken: Take each chicken piece and dredge it in the coating. First, cover one side, then flip it over and repeat. Press down a bit to help the coating stick. Trust me, the more, the merrier!
-
Preheat Your Air Fryer: Preheat your air fryer to 380°F. This step is key for achieving that crispy skin!
-
Arrange in the Basket: Once heated, place the coated chicken breasts in the air fryer basket. Make sure they aren’t overcrowded; this allows the hot air to circulate around them for even cooking.
-
Cooking Time: Set your timer to cook for 12 minutes. Don’t forget to flip the chicken halfway through—this ensures both sides get that golden brown color.
-
Check for Doneness: After 12 minutes, check to make sure the chicken is thoroughly cooked. It should reach an internal temperature of 165°F. If they need a little more time, feel free to add a couple of extra minutes.
-
Serve Hot: Once cooked, take the chicken out and let it rest for a few minutes. This helps keep the juices inside. Then, serve it up hot with your favorite sauce or dip!
Why I Love Making This Dish:
It’s honestly one of my go-to recipes for busy weeknights. Not only is it quick and easy, but it also fills the house with a comforting aroma that warms the heart. I love that I can whip this up with simple ingredients and still impress my family. They always rave about the crunchiness and the burst of flavor, and I just love seeing their smiles at the dinner table!
What You’ll Need:
Besides the ingredients, there are a few tools that make this recipe easier. You’ll need a sharp knife for slicing the chicken, a butter knife for spreading the mayo, a mixing bowl for the coating, and of course, your trusty air fryer! If you don’t have an air fryer, you can also bake the chicken, but the air fryer gives it that wonderful crispy texture without the extra oil.
Tips for Perfect Results:
Want to make your chicken even crispier? Try placing it in the air fryer in a single layer without overlapping. If you have an oil sprayer, a light misting of oil can boost that crunch factor too! And remember to let them sit for a minute after cooking; this resting time is crucial for locking in moisture.
Serving Suggestions and Sides:
This Air Fryer Parmesan Crusted Chicken pairs beautifully with so many side dishes! I love serving it alongside a fresh garden salad or some roasted veggies. A side of garlic mashed potatoes makes for a heartier meal, and if you want to dip, a zesty ranch or honey mustard sauce complements it so well. Feel free to get creative with your sides based on what your family enjoys!
Leftovers:
If you happen to have leftovers (which I doubt will happen!), you’ll need to store them properly. Just place your cooled chicken in an airtight container and refrigerate for up to three days. When you’re ready to reheat, pop them back in the air fryer for a few minutes at 350°F to restore that crispy texture. You’ll thank yourself for having the extra food ready for a quick lunch!
FAQ Section:
Can I use boneless chicken?
Absolutely! Boneless is perfect for this recipe, and it cooks faster, so you’ll save time. I’ve tried both ways, and boneless tends to be easier to manage and can be just as tasty.
What can I substitute for mayonnaise?
If mayo isn’t your favorite, you can use Greek yogurt or mustard as a healthier alternative. It’s all about making the recipe your own!
Can I freeze this chicken?
You sure can! If you want to make a big batch, feel free to freeze them after cooking. Just let them cool completely before placing them in a freezer-safe bag. When you want them, let them thaw in the refrigerator overnight and reheat as mentioned earlier.
This Air Fryer Parmesan Crusted Chicken has become a favorite in my house, and I’m so excited for you to try it! I know you’ll love it as much as I do, especially with how easy it is to make. It’s perfect for those busy nights when you still want to serve something delicious and comforting.
So, gather those ingredients and take that leap into making your family’s dinner special. I can’t wait to hear about your experiences! Will your family ask for seconds too? Let me know how it turns out!

Air Fryer Parmesan Crusted Chicken
Ingredients
Main Ingredients
- 2 pieces boneless, skinless chicken breasts These are the stars of our dish, keeping it simple and healthy.
- 1/4 cup mayonnaise Adds moisture and helps the coating stick.
- 1/3 cup Parmesan cheese, freshly grated Provides flavor and nuttiness.
- 1/3 cup Panko breadcrumbs Gives a delightful crunchy texture.
- 1/4 tsp garlic powder Brightens up the flavor.
- 1/4 tsp Italian seasoning Herby and aromatic blend.
- 1/2 tsp paprika Adds warmth and color.
- 1/2 tsp black pepper, freshly ground Adds a touch of spiciness.
- 1/4 tsp sea salt Adjust to taste for proper seasoning.
Instructions
Preparation
- Slice each chicken breast horizontally into two halves for even cooking.
- Pat the chicken dry with paper towels to ensure a crispy exterior.
- Spread mayonnaise evenly on both sides of the chicken.
Coating
- In a wide and shallow bowl, combine Parmesan, Panko breadcrumbs, garlic powder, Italian seasoning, paprika, black pepper, and sea salt. Mix well.
- Dredge each chicken piece in the coating, covering one side and then the other. Press down to help the coating stick.
Cooking
- Preheat your air fryer to 380°F.
- Place the coated chicken breasts in the air fryer basket without overcrowding.
- Cook for 12 minutes, flipping halfway through to ensure even browning.
- Check for doneness; chicken should reach an internal temperature of 165°F.
- Let the chicken rest for a few minutes before serving.