Every time I make Cherry Bars, I’m transported back to my childhood summers spent at my grandmother’s house. Those warm days would often have us gathered in her cozy kitchen, the smell of baked goods wafting through the air, and laughter echoing all around. I remember one summer in particular when Grandma decided to introduce me to the world of baking. She set me up on the kitchen counter, our aprons tied tight, and we whipped up a batch of her famous Cherry Bars. As we stirred the ingredients together, her stories filled the room, and soon I wasn’t just learning to bake; I was absorbing family tradition and love. Now, I want to share this cherished recipe with you and help you create your own warm memories around these delightful treats.
These Cherry Bars have a unique way of bringing joy into any gathering, and I promise, once you taste them, you’ll understand why they hold such a special place in my heart. The combination of sweet cherries, a buttery crust, and a light glaze is simply irresistible. You’ll be amazed at how simple the whole process is, and before you know it, you’ll find yourself savoring every last bite alongside your loved ones.
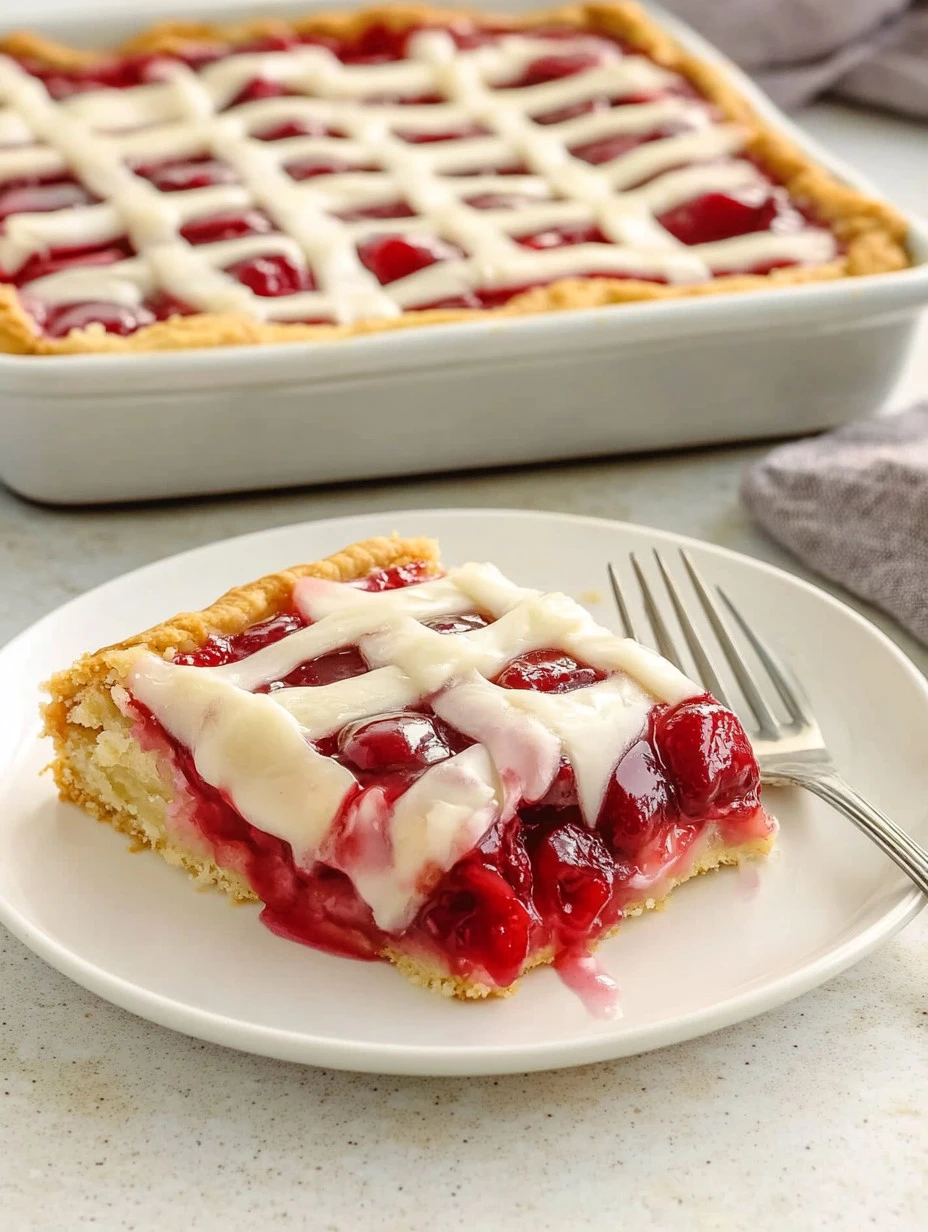
How to make Cherry Bars
Ingredients:
- 2 cups fresh or frozen cherries, pitted: The star of the show! Fresh cherries are always better if you can get them, but frozen will work great in a pinch.
- 1/2 cup butter, softened: This gives the bars that rich, creamy flavor that we all love so much.
- 1 cup sugar: A must for balancing the tartness of the cherries.
- 1 egg: This is what binds everything together and gives the bars a nice texture.
- 1 teaspoon vanilla extract: Just a touch for flavoring. You know how much I cherish flavor in all my baking!
- 1 1/2 cups all-purpose flour: This provides the structure for our bars.
- 1/2 teaspoon baking powder: A little lift, making the bars light and fluffy.
- 1/4 teaspoon salt: It enhances all the other flavors. Never forget the salt—trust me on this!
- 1 cup powdered sugar: This is for our glaze, giving it that sweet finish.
- 2 tablespoons milk: This will help create the glaze’s smooth consistency.
Cooking Steps
-
First, start by preheating your oven to 350°F (175°C). Trust me; this is key for achieving that perfect texture!
-
Next, grab a 9×13 inch baking dish and grease it up nicely. You don’t want those delicious bars to stick!
-
In a large bowl, cream together the softened butter and sugar until it’s light and fluffy—this takes about 2-3 minutes. I always love to use my electric mixer for this part; it makes life so much easier!
-
Now it’s time to add in the egg and vanilla extract. Beat well until everything is well combined and smooth.
-
In a separate bowl, whisk together the flour, baking powder, and salt. This step helps ensure that your baking powder is evenly distributed throughout the flour, leading to consistent results.
-
Gradually, you’ll want to add the dry ingredients to the wet mixture. Stir gently until it’s just combined. It’s okay if there are a few lumps. Overmixing can lead to tougher bars!
-
Now, carefully fold in the cherries. I always find this part so satisfying! Just make sure the cherries are evenly distributed throughout the batter.
-
Pour the mixture into the prepared baking dish, smoothing it out into an even layer.
-
Place the dish in the preheated oven and bake for 30-35 minutes. You’ll know they’re ready when a toothpick inserted in the center comes out clean. The aroma will be heavenly—an early sign that you’re on your way to cherry bar bliss!
-
While the bars are cooling, let’s prepare that delightful glaze! In a small bowl, combine the powdered sugar and milk. Whisk until it’s smooth and the desired consistency is reached. You can always add a little more milk if it’s too thick.
-
Once the bars have cooled, drizzle that luscious glaze over the top. Don’t be shy; let it ooze a bit for that beautiful homemade aesthetic!
-
Finally, slice the bars into squares and serve them up. Trust me, they won’t last long!
Why I Love Making This Dish:
Cherry Bars hold a special place in my heart for so many reasons. They represent love, tradition, and the joy of family gatherings. Just thinking about this recipe brings a warm smile to my face. You’ll see how easy they are to make but also how much pleasure they can bring to your loved ones. I love making these for summer picnics and family reunions—they always vanish before I can get a second piece!
What You’ll Need:
For this recipe, you will need some basic kitchen tools. A large mixing bowl, electric mixer, measuring cups, a whisk, and a 9×13 inch baking dish are essentials. If you have a good set of mixing spatulas, those can be lifesavers too! I also find it helpful to keep parchment paper around to line my baking dish for easy cleanup.
Tips for Perfect Results:
- Always use room temperature butter and eggs; they mix in better and create a smoother batter. This makes a world of difference in baked goods!
- If you can, take the time to pit fresh cherries yourself. I know it’s a chore, but the flavor is just unparalleled.
- Don’t over-bake your bars! Keeping an eye on them after the 25-minute mark is crucial. Ovens can vary, and you want them soft and slightly golden.
Serving Suggestions and Sides:
These Cherry Bars are delightful on their own, but if you want to elevate your dessert table, consider pairing them with a scoop of vanilla ice cream or whipped cream on the side. The cold creaminess complements the sweet and tart flavors in the bars beautifully. I often enjoy mine with a cup of freshly brewed coffee as it contrasts wonderfully with sweetness.
Leftovers:
If you happen to have leftovers (which is rare in my house), simply store them in an airtight container at room temperature for a day or two. You can also refrigerate them for up to a week. To reheat, just pop them in the microwave for about 10-15 seconds. This will bring back their deliciousness, making it feel like they just came out of the oven!
FAQ Section:
Can I use frozen cherries for this recipe?
Yes, you can! I often use frozen cherries if fresh ones aren’t available. Just make sure to thaw and drain them first to avoid excess moisture in the batter.
What can I do if I want to make these bars gluten-free?
You can substitute all-purpose flour with a 1:1 gluten-free baking mix. As someone who loves creating alternatives for everyone, I can tell you it works quite well!
Can I double this recipe?
Absolutely! Just make sure to adjust your baking time, as it might take a little longer if you put the batter in a larger pan.
Can I add other fruits?
Definitely! I love experimenting with blueberries or diced peaches. It’s a delightful way to change things up!
This Cherry Bars recipe has woven itself into the fabric of my family’s gatherings, and I’m so excited for you to create your own memories with this treat. I know you’ll love it just as much as I do! When you watch your family gather around, their faces lighting up with delight, you’ll realize the magic of this simple recipe. So go on and try it—you won’t regret it! Let me know how it turns out, and if your loved ones ask for seconds, just like mine do every time!
Cherry Bars
Ingredients
For the Bars
- 2 cups fresh or frozen cherries, pitted Fresh cherries are preferred, but frozen can work.
- 1/2 cup butter, softened This gives the bars a rich, creamy flavor.
- 1 cup sugar Balances the tartness of the cherries.
- 1 egg Binds everything together.
- 1 teaspoon vanilla extract For flavoring.
- 1 1/2 cups all-purpose flour Provides structure.
- 1/2 teaspoon baking powder Provides lift for the bars.
- 1/4 teaspoon salt Enhances flavor.
For the Glaze
- 1 cup powdered sugar For the glaze.
- 2 tablespoons milk For achieving the desired glaze consistency.
Instructions
Preparation
- Preheat your oven to 350°F (175°C).
- Grease a 9×13 inch baking dish.
- In a large bowl, cream together softened butter and sugar until light and fluffy (about 2-3 minutes).
- Add in the egg and vanilla extract, beating well until combined and smooth.
- In a separate bowl, whisk together flour, baking powder, and salt.
- Gradually add the dry ingredients to the wet mixture, stirring gently until just combined.
- Fold in the cherries, ensuring they are evenly distributed.
Baking
- Pour the mixture into the prepared baking dish and smooth it out.
- Bake in the preheated oven for 30-35 minutes, or until a toothpick inserted comes out clean.
Glaze and Serve
- While the bars are cooling, prepare the glaze by whisking together powdered sugar and milk until smooth.
- Once cooled, drizzle the glaze over the bars.
- Slice into squares and serve.