Every time I make Chicken Taquitos, it brings me back to those cozy family gatherings where laughter filled the air and everyone was happily gathered around the table. There’s something so comforting about the crispy tortilla wrapped around warm, cheesy goodness that simply takes me to my happy place. I can still hear my kids requesting this dish, imploring for just one more taquito while trying to sneak bites when they thought I wasn’t looking. It always warms my heart to see everyone’s faces light up when I serve them this special treat. I know once you try it, you and your family will feel the same warmth and love that emanates from this dish!
How to make Chicken Taquitos
Ingredients:
- 1 cup cream cheese: This adds a rich, creamy texture that you simply can’t resist.
- 1 cup sour cream: It brings a nice tanginess, balancing out the flavors perfectly.
- 2 cups diced cooked chicken: This is the star of the show! You can use leftover chicken, rotisserie chicken, or even boiled chicken; whatever you prefer!
- 1 cup shredded cheddar cheese: A classic choice that melts beautifully and adds flavor.
- 1 cup shredded pepper jack cheese: For those who enjoy a little kick, this cheese brings just the right amount of spice.
- 8-10 flour or corn tortillas: These are the cozy blankets that hold everything together.
I absolutely love adding fresh herbs to my taquitos—especially cilantro! It gives such a fresh taste and a pop of color. And if you’re looking to switch things up, consider using shredded beef or beans as a filling; they work wonderfully too!
Cooking Steps:
-
Prepare the Filling Start by taking a large mixing bowl and combine the cream cheese, sour cream, diced cooked chicken, and both types of shredded cheese. Use a spatula to mix everything together until it’s well combined. Honestly, the smell is heavenly already!
-
Warm the Tortillas Next, you’ll want to warm the tortillas. You can do this by placing them on a microwave-safe plate, covering them with a damp cloth, and heating them in the microwave for about 30 seconds. This makes them easier to roll without breaking.
-
Fill the Tortillas Lay a warm tortilla on a clean surface and scoop a generous amount of the cheesy chicken mixture into the center. Don’t be shy—give it a good amount!
-
Roll ‘Em Up Carefully roll the tortilla from the bottom up, folding in the sides as you go. Make sure it’s nice and tight so that none of that delicious filling escapes. If needed, secure the end with a toothpick.
-
Heat the Oil In a large skillet, heat about an inch of oil over medium heat. You want it hot enough to fry but not too hot that it splatters everywhere. The oil should shimmer when it’s ready.
-
Fry the Taquitos Once the oil is hot, gently place a few taquitos in the pan, seam side down. You don’t want to overcrowd the pan; it’s better to do this in batches. Fry for about 2-3 minutes on each side, or until they’re golden brown and crispy.
-
Drain the Oil Carefully remove the taquitos from the oil and let them drain on a paper towel-lined plate. This helps to absorb any excess oil, leaving you with a crispy, crunchy exterior.
-
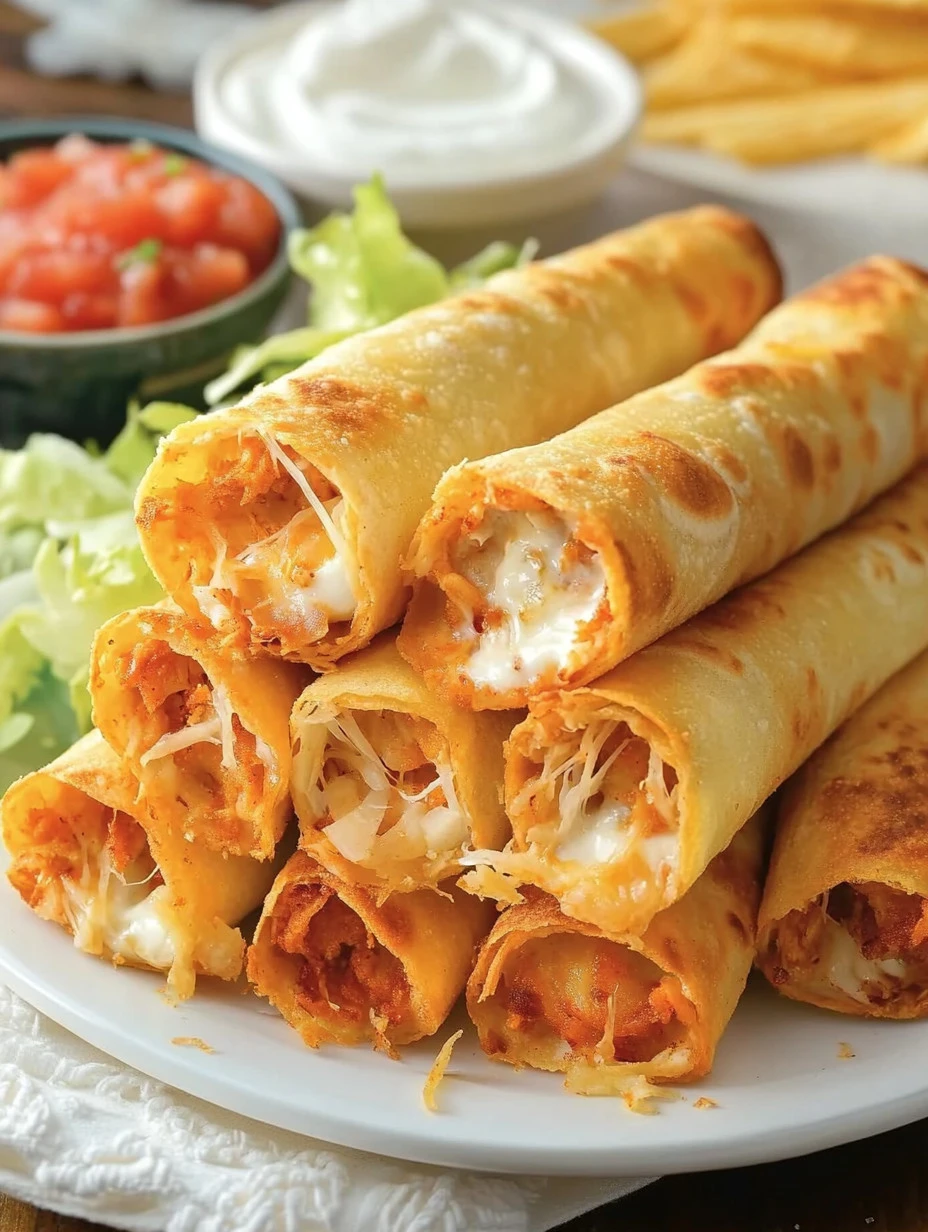
Serve and Enjoy Now it’s time to dig in! Serve your Chicken Taquitos warm with your favorite salsa, guacamole, or a dollop of sour cream. Trust me; they won’t last long!
Why I Love Making This Dish What I absolutely adore about Chicken Taquitos is not just how scrumptious they are, but also the joy they bring to my family. Whenever I make them, I can see the excitement on their faces. It’s such a wonderful way to bring everyone together, whether it’s for a casual weeknight dinner or a party. The beauty of this dish is its versatility; you can easily adjust flavors, add veggies, or make it milder or spicier according to your family’s preferences. Plus, they’re fun to eat!
What You’ll Need: Make sure you have a reliable skillet for frying and a mixing bowl for preparing the filling. Some people like to use tongs for flipping the taquitos in the oil, which I highly recommend! It keeps your hands a bit cleaner.
Step-by-Step Guide:
- Preheat the oil; you’ll want it hot to achieve that perfect crunch.
- Prepare the filling in a single bowl; less mess is always better!
- Warm the tortillas to avoid tearing.
- Don’t hesitate to fill those tortillas generously; you’re going to love every bite!
- Roll them tightly but not too tightly—give that filling a little room to expand.
- Fry patiently; golden brown is your goal.
- Drain, serve, and watch those smiles!
Tips for Perfect Results To make your taquitos extra crispy, consider using a combination of flour and corn tortillas. Flour tortillas are softer, while corn can give that extra crunch. Also, don’t skip the step of warming the tortillas—it makes a world of difference in preventing them from breaking apart while rolling. If you want to sneak in some veggies, try adding finely chopped bell peppers or spinach to the filling. It’s a great way to boost nutrition without sacrificing flavor!
Serving Suggestions and Sides Chicken Taquitos pair wonderfully with a fresh, zesty salad, perfect for balancing the richness of the taquitos. You can whip up a quick avocado salad or even some Mexican street corn for a delightful side dish. And don’t forget about the dipping options! I love serving mine alongside homemade salsa, a spicy chipotle mayo, or guacamole. The vibrant colors and flavors make it a feast for both the eyes and the palate!
Leftovers If you happen to have any taquitos left (though I doubt you will!), you can store them in an airtight container in the fridge. They’re best eaten within a couple of days, but if you store them properly, they can last for up to three days. To reheat, pop them in the oven at 350°F for about 10-15 minutes until they’re heated through and crispy again. Nobody wants a soggy taquito!
FAQ Section Can I use leftover chicken? Absolutely! In fact, I often use leftover rotisserie chicken from the grocery store. This recipe is perfect for cleaning out the fridge!
Can I make them vegetarian? Of course! Skip the chicken and add in some black beans, corn, or sautéed vegetables instead. The cheese and creamy mixture will still hold everything together beautifully.
Do I have to fry them? You can bake them if you’d prefer a healthier option. Arrange them on a baking sheet, spray with a little cooking oil, and bake at 400°F until golden, about 15-20 minutes.
Can I freeze them? Definitely! Just roll them up without frying and freeze in an airtight container. When you’re ready to cook, you can fry or bake them from frozen; just add a few extra minutes to the cooking time.
This dish has become a cherished favorite in my house, and I’m so excited for you to try it. The crispy exterior and warm, cheesy filling are truly a match made in heaven. I know you’ll love it as much as I do! Let me know how it turns out, and if your family asks for seconds, just like mine does every time. Happy cooking!

Chicken Taquitos
Ingredients
For the Filling
- 1 cup cream cheese Adds a rich, creamy texture.
- 1 cup sour cream Brings a tanginess that balances flavors.
- 2 cups diced cooked chicken Use leftover, rotisserie, or boiled chicken.
- 1 cup shredded cheddar cheese Melts beautifully and adds flavor.
- 1 cup shredded pepper jack cheese Adds a spicy kick.
For the Taquitos
- 8-10 pieces flour or corn tortillas Holds everything together.
Instructions
Preparation
- Combine the cream cheese, sour cream, diced cooked chicken, and both types of shredded cheese in a mixing bowl until well combined.
- Warm the tortillas by covering them with a damp cloth on a microwave-safe plate and heating for about 30 seconds.
- Scoop a generous amount of the cheesy chicken mixture into the center of a warm tortilla.
- Roll the tortilla tightly from the bottom up, folding in the sides. Secure with a toothpick if needed.
Cooking
- Heat about an inch of oil in a large skillet over medium heat until shimmering.
- Place a few taquitos seam side down in the hot oil and fry for about 2-3 minutes on each side until golden brown and crispy.
- Remove the taquitos from oil and let drain on a paper towel-lined plate.
- Serve warm with salsa, guacamole, or sour cream.