Every time I make this Dutch Apple Pie, it reminds me of Sunday dinners with family gathered at my kitchen table. The smell alone brings back wonderful memories of my grandmother rolling out dough and the excited chatter as we waited for our favorite dessert to cool just long enough to dig in. As I prepare this pie, the warmth of cinnamon and sweetness of apples fill the air, wrapping me in nostalgia. I know once you try it, you’ll feel the same warmth and comfort!
So let’s dive into how we can create this delightful pie together.
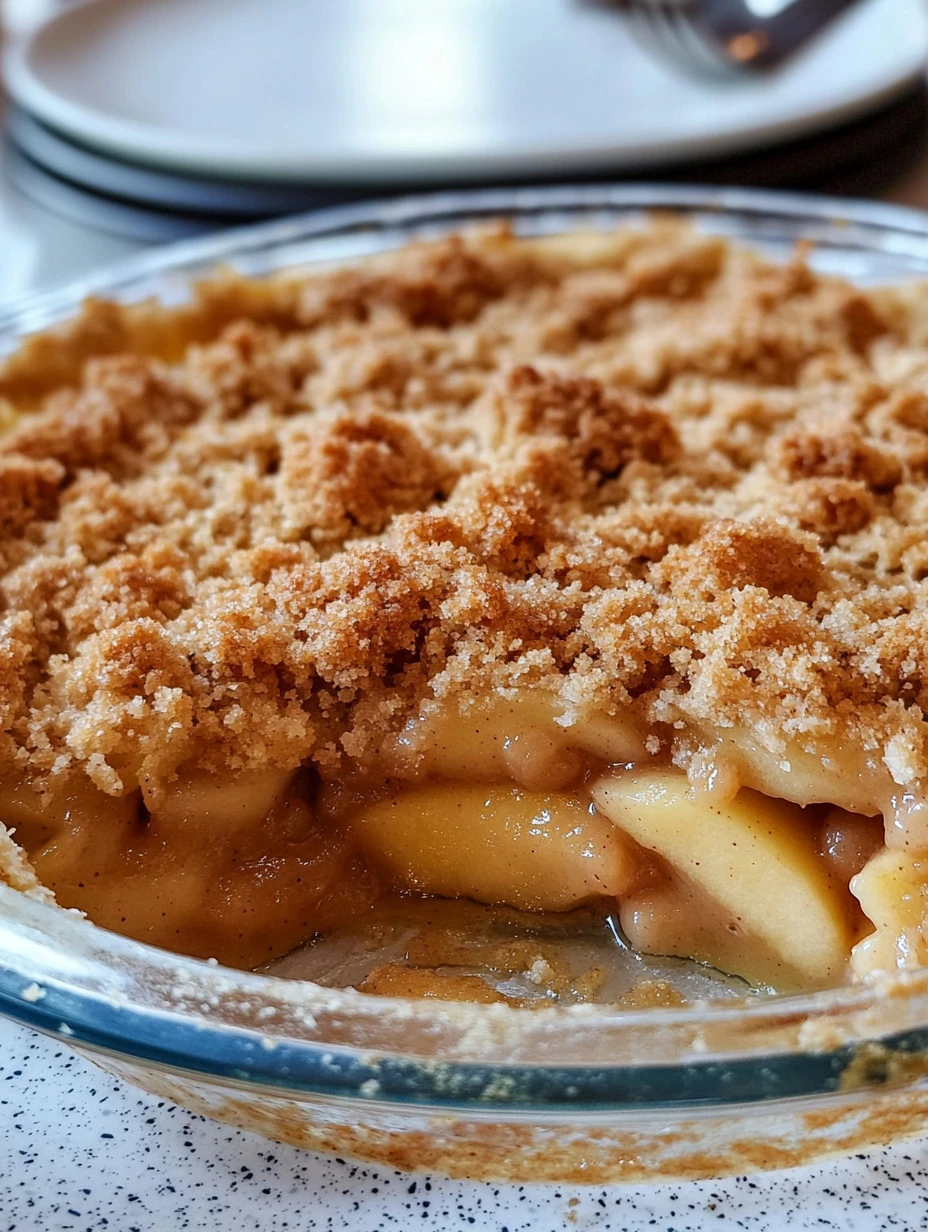
How to Make Dutch Apple Pie
Ingredients:
- 2 1/2 cups all-purpose flour: This is the foundation of our flaky pie crust. Don’t skimp on quality!
- 1 cup unsalted butter, cold and diced: For that rich, buttery flavor, cold butter makes a world of difference.
- 1/4 cup granulated sugar: Just the right amount to sweeten the crust without overpowering it.
- 1/2 teaspoon salt: Salt enhances the flavors and balances the sweetness.
- 6 to 8 tablespoons ice water: This helps bind the dough together and keeps our crust flaky.
- 6 to 8 apples (e.g., Granny Smith and Honeycrisp), peeled, cored, and sliced: The stars of the show! A mix of sweet and tart apples brings depth to the filling.
- 3/4 cup granulated sugar (for filling): Perfect to sweeten the apples beautifully.
- 1 teaspoon cinnamon: This aromatic spice is a must-have for that warm, homey flavor.
- 1 tablespoon lemon juice: Brightens the filling and prevents the apples from browning.
- 3/4 cup flour (for crumb topping): Adds a delightful crunch to every slice.
- 1/2 cup brown sugar: For that lovely caramelized flavor.
- 1/2 cup butter, melted: It’s easy to mix into the crumb topping when melted.
- 1/2 teaspoon salt: Again, we need that balance!
I love adding a pinch of nutmeg to the apple filling; it adds an extra layer of warmth that I think you will appreciate too!
Cooking Steps
-
Preheat the oven: Start by preheating your oven to 425°F (220°C). Trust me, this is key for a golden, flaky crust!
-
Make the pie crust: In a large bowl, combine the flour, sugar, and salt. Cut in the cold, diced butter using a pastry cutter or your fingers until you have coarse crumbs. It’s messy, but it’s part of the fun! Then, stir in enough ice water until the dough forms a ball.
-
Chill the dough: Wrap the dough in plastic wrap and refrigerate it for at least 4 hours or overnight. I know it feels like a lot of waiting, but it’s so worth it!
-
Roll out the dough: When you’re ready, roll out half of the dough on a floured surface. Don’t rush—take your time to get it thin and even. Fit it into your pie dish, making sure to patch up any cracks.
-
Prepare the apple filling: In a large bowl, toss together the sliced apples, sugar, cinnamon, and lemon juice. Make sure every apple slice is coated!
-
Fill the crust: Pour the apple mixture into the pie crust, spreading it out evenly. There’s something so satisfying about this moment, seeing all those beautifully seasoned apples ready to cook!
-
Make the crumb topping: In a medium bowl, mix together the flour, brown sugar, and salt. Then stir in the melted butter until it’s crumbly.
-
Add the topping: Sprinkle the crumb topping generously over the apple filling. The more, the merrier, I always say!
-
Bake the pie: Bake in your preheated oven for 15 minutes. Then, reduce the temperature to 350°F (175°C) and bake for an additional 35 to 45 minutes. Keep an eye on it; you want the apples to get nice and tender, and the topping to be golden brown!
-
Let it cool: Ah, the hardest part! Once it’s out of the oven, allow the pie to cool before slicing. The aroma will fill your kitchen, and trust me, that’s a true delight!
Now you’ve made a Dutch Apple Pie that I’m sure your family will adore!
Why I Love Making This Dish
What makes Dutch Apple Pie so special to me isn’t just the flavors but the memories it brings flooding back. Every bite is filled with love, laughter, and family gatherings. I can still picture my kids helping me peel apples, their small hands struggling a bit, but their enthusiasm shining through. It’s a dish that brings everyone together, sparking conversations and joyful moments around the table.
Tips for Perfect Results
Here are some of my tried-and-true tips for making sure this pie comes out perfect every single time:
- Use cold ingredients: This is crucial for a flaky crust! The cold butter and ice water help create those delicious layers.
- Don’t rush: Take your time with each step. It’s all about the process!
- Mix up your apple varieties: A combination of tart and sweet apples gives the pie a beautiful balance. I love using Granny Smith for tartness and Honeycrisp for sweetness!
- Keep an eye on your topping: If it gets too brown before the apples are cooked, cover it loosely with aluminum foil.
Serving Suggestions and Sides
Serve your Dutch Apple Pie with a scoop of vanilla ice cream or whipped cream on the side. The contrast of warm pie with cold ice cream is heavenly! You could also pair it with a drizzle of caramel sauce for extra indulgence.
What goes well with pie? A nice cup of hot coffee or perhaps a cinnamon-spiced tea. Trust me; it’s the perfect way to wind down after the day.
Leftovers
If you have any leftovers—though I doubt it—you can store the pie covered in the refrigerator for up to 3 days. Reheat individual slices in the microwave for about 20-30 seconds until warm. This is one of those pies that tastes just as good, if not better, the next day!
FAQ Section
-
Can I use store-bought pie crust?
You certainly can! While I love the homemade touch, a good quality store-bought crust can save you time and still taste amazing. -
What type of apples work best?
I recommend a mix of tart and sweet apples such as Granny Smith and Honeycrisp. You could also try Fuji or Braeburn for a change! -
Can I make this pie in advance?
Absolutely! You can prepare the pie the day before and keep it in the fridge. Just bake it on the day you plan to serve it for the freshest taste! -
How do I know when the pie is done?
The pie is done when the apples are tender, and the crust is golden brown. You can check by gently wiggling the pie—if it feels set and not jiggly, you’re good to go! -
Can I freeze this pie?
Yes! If you want to make it ahead of time, freeze it unbaked. Just cover it tightly and bake it straight from the freezer, adding time as needed.
This Dutch Apple Pie has become a treasured recipe in my home, and I’m so excited for you to try it. This simple yet delicious dish will surely warm your heart and create lasting memories. I know you’ll love it just as much as I do! When you’re ready to dig in, make sure to let me know how it turns out—you may just find your family asking for seconds, just like mine does every time.
Dutch Apple Pie
Ingredients
For the Pie Crust
- 2 1/2 cups all-purpose flour This is the foundation of our flaky pie crust. Don't skimp on quality!
- 1 cup unsalted butter, cold and diced For that rich, buttery flavor, cold butter makes a world of difference.
- 1/4 cup granulated sugar Just the right amount to sweeten the crust without overpowering it.
- 1/2 teaspoon salt Salt enhances the flavors and balances the sweetness.
- 6 to 8 tablespoons ice water This helps bind the dough together and keeps our crust flaky.
For the Apple Filling
- 6 to 8 pieces apples (e.g., Granny Smith and Honeycrisp), peeled, cored, and sliced A mix of sweet and tart apples brings depth to the filling.
- 3/4 cup granulated sugar Perfect to sweeten the apples beautifully.
- 1 teaspoon cinnamon This aromatic spice is a must-have for that warm, homey flavor.
- 1 tablespoon lemon juice Brightens the filling and prevents the apples from browning.
For the Crumb Topping
- 3/4 cup flour Adds a delightful crunch to every slice.
- 1/2 cup brown sugar For that lovely caramelized flavor.
- 1/2 cup butter, melted It's easy to mix into the crumb topping when melted.
- 1/2 teaspoon salt Again, we need that balance!
- Pinch nutmeg Adds an extra layer of warmth.
Instructions
Preparation
- Preheat your oven to 425°F (220°C).
- In a large bowl, combine flour, sugar, and salt. Cut in cold butter until you have coarse crumbs. Stir in enough ice water until the dough forms a ball.
- Wrap the dough in plastic wrap and refrigerate it for at least 4 hours or overnight.
- Roll out half of the dough on a floured surface and fit it into your pie dish.
- In a large bowl, toss together the sliced apples, sugar, cinnamon, and lemon juice.
Assembly
- Pour the apple mixture into the pie crust, spreading it out evenly.
- In a medium bowl, mix together the flour, brown sugar, and salt. Stir in melted butter until crumbly.
- Sprinkle the crumb topping generously over the apple filling.
Baking
- Bake in your preheated oven for 15 minutes.
- Reduce the temperature to 350°F (175°C) and bake for an additional 35 to 45 minutes.
- Allow the pie to cool before slicing.