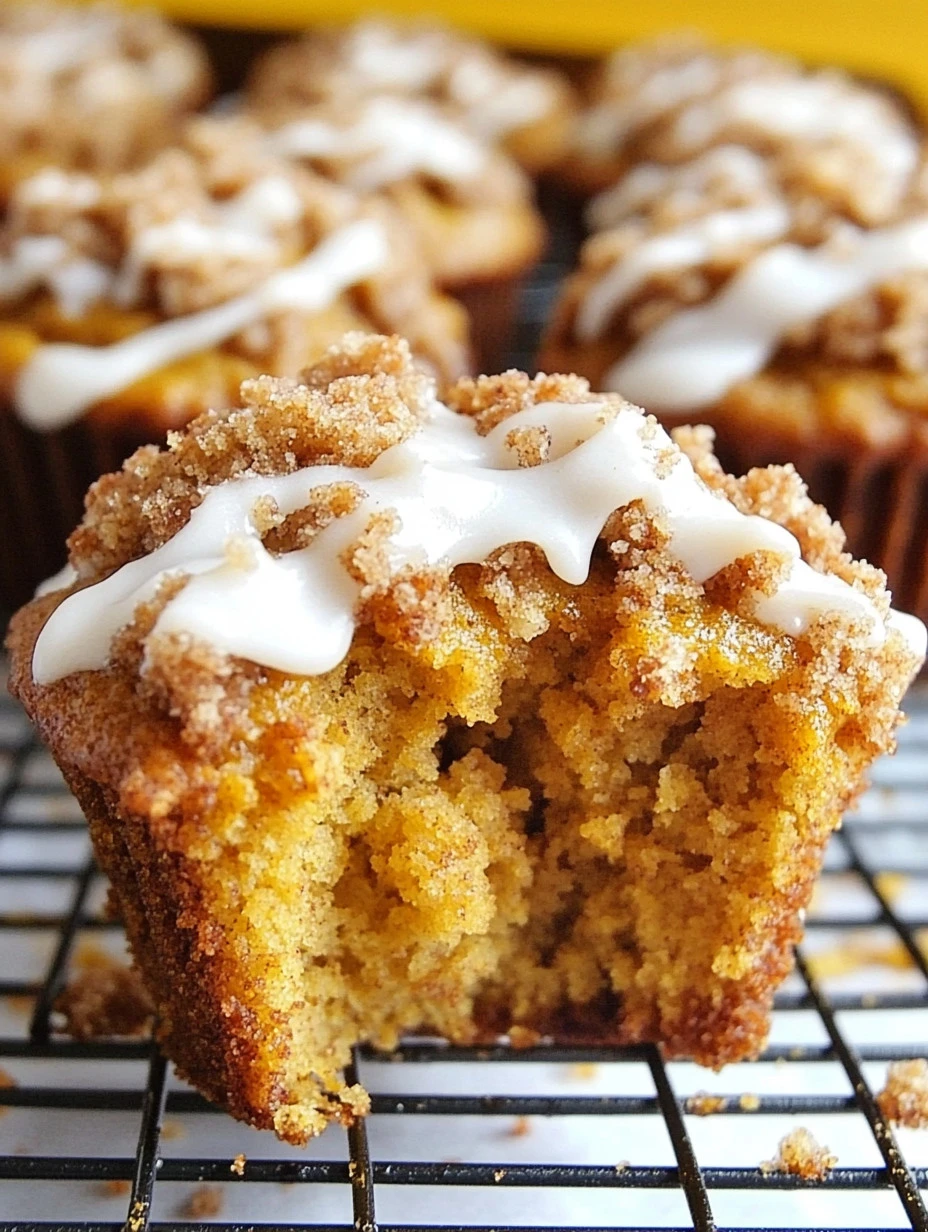
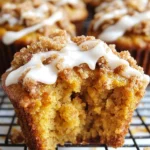
Every time I make these Pumpkin Muffins, it brings me back to cozy autumn days in my small kitchen, where the smell of spices and fresh pumpkin wafts through the air. There’s just something magical about baking—a way it fills a house with warmth and joy. I remember the first time I baked them, it was a family gathering, and I had my grandchildren darting around the kitchen, their laughter ringing as they helped mix and pour. I can’t help but smile as I recall the delighted faces when they took that first bite, eyes wide with happiness. If you’re looking for a recipe that will not only fill your tummy but also your heart with joy, you’ve come to the right place! Once you try these Pumpkin Muffins, I promise you’ll be sharing this recipe with your own family and friends, just like I do!
How to make Pumpkin Muffins
Ingredients:
Let’s gather what you will need to create these delightful muffins! Each ingredient is important, not just for flavor but also for making the muffins rise and become just the right amount of moist. Here’s what you’ll need:
- 1 1/2 cups all-purpose flour: This is the base of your muffins. It gives them structure and helps them rise beautifully.
- 1 teaspoon baking powder: This is essential for giving your muffins that lovely lift.
- 1/2 teaspoon baking soda: This works with the pumpkin to help them rise, too.
- 1/2 teaspoon salt: A pinch of salt enhances all the flavors in the muffins.
- 1 teaspoon ground cinnamon: The warm, comforting flavor of cinnamon really brings out the best in pumpkin.
- 1/2 teaspoon ground nutmeg: A sprinkle of nutmeg adds a delightful depth—it’s my secret weapon!
- 1 cup pumpkin puree: The star ingredient! It makes the muffins moist and flavorful. You can use canned or fresh—your choice!
- 2/3 cup granulated sugar: This sweetens the muffins just right.
- 1/3 cup vegetable oil: Oil makes them soft and moist; butter works too if you prefer.
- 2 large eggs: Eggs are the glue that holds everything together.
- 1 teaspoon vanilla extract: A splash of vanilla gives a lovely backdrop of flavor.
-
For the crumb topping:
- 1/4 cup butter: Melted, for that irresistible crumbling on top.
- 1/4 cup brown sugar: It adds sweetness and a slight caramel flavor.
- 1/4 cup flour: It helps the topping stick together.
- 1 teaspoon cinnamon: Because you can never have too much cinnamon!
-
For the glaze:
- 4 tablespoons maple syrup: Gives the muffins a delicious drizzle.
- 1 teaspoon cinnamon: Just to tie it all together.
Cooking Steps
-
Preheat the Oven: First things first, preheat your oven to 350°F (175°C) and line a muffin tin with paper liners. Trust me, this is key for your muffins not sticking!
-
Combine Dry Ingredients: In a large bowl, whisk together the flour, baking powder, baking soda, salt, cinnamon, and nutmeg. This step ensures everything is evenly mixed.
-
Mix Wet Ingredients: In another bowl, combine the pumpkin puree, granulated sugar, vegetable oil, eggs, and vanilla. Mix until everything is well blended. You’ll love this step—just watch that vibrant orange color come to life!
-
Combine Everything: Gradually add the dry mixture to your wet mixture. Use a spatula to fold them together. Be gentle! You want it just combined; a few lumps are perfectly okay.
-
Spoon into Muffin Tin: Spoon the batter into the muffin tin, filling each cup about two-thirds full. This gives them plenty of room to rise!
-
Make the Crumb Topping: In a small bowl, mix together the melted butter, brown sugar, flour, and cinnamon until crumbly. Sprinkle this over the top of each muffin, giving it that delightful crunch you love.
-
Bake: Pop your muffin tin into the oven and bake for 20-25 minutes. You’ll know they’re ready when a toothpick inserted in the center comes out clean.
-
Prepare the Glaze: While the muffins are baking, whisk together the maple syrup and cinnamon in a small bowl. This quick glaze takes them over the top!
-
Cool: Once your muffins are baked, allow them to cool in the tin for about five minutes, then transfer them to a wire rack. This lets them cool evenly.
-
Drizzle the Glaze: When the muffins are completely cool, drizzle the glaze over the tops. You can be generous—who doesn’t love a good drizzle?
-
Serve and Enjoy: These muffins are best enjoyed fresh but are delicious for days to come. Serve them at breakfast, as a snack with tea, or even as dessert!
Why I Love Making This Dish
There’s something about making Pumpkin Muffins that feels special. The fun starts with pumpkin spice in the air and ends with smiles all around. I love that they remind me of my childhood, of crisp autumn days and visits to the local pumpkin patch. It’s not just about eating; it’s about creating memories that you can hold onto long after the last crumb is gone. Plus, they are a fantastic way to use up pumpkin puree, especially during the fall when we have an abundance of pumpkins around.
What You’ll Need
You won’t need any fancy equipment for this recipe. A simple mixing bowl, a whisk, a muffin tin, and a spatula will do just fine. If you have muffin liners, that’s great! They help with easy removal and ensure a perfect shape.
Step-by-Step Guide
- Start by preheating the oven. This is crucial for ensuring those muffins bake perfectly!
- Gather all your ingredients to make the process smoother. A well-prepped kitchen makes baking less stressful and more enjoyable.
- Prepare your muffin tins with liners. This means less mess and easier cleanup—always a win in my book!
- Follow the steps outlined above, and remember to have fun. You can even get the grandkids involved—they’ll love pouring and mixing!
Tips for Perfect Results
- Don’t overmix the batter: Overmixing can lead to dense muffins, and we want them light and fluffy. Just mix until combined.
- Use fresh ingredients: For the best flavor, make sure your spices are fresh. Old spices can lose their punch!
- Check for doneness with a toothpick: If it comes out clean or with a few crumbs, they’re good to go. It’s better to underbake slightly than to overbake.
Serving Suggestions and Sides
These Pumpkin Muffins are delightful on their own but even better with a hot cup of coffee or tea. If you want to get a little fancy, try serving them with a smear of butter or cream cheese spread. You can even pair them with a seasonal soup or salad for a light lunch. They make a fantastic addition to a brunch spread, alongside fruit and yogurt!
Leftovers
If you happen to have leftovers—though I highly doubt it—they store beautifully. Just keep them in an airtight container at room temperature for a few days. You can reheat them in the microwave for about 10-15 seconds to bring back that fresh-baked flavor.
FAQ Section
Can I use fresh pumpkin instead of canned?
Absolutely! Using fresh pumpkin is a beautiful way to elevate this recipe. Just make sure you puree it well before using.
What if I don’t have ground nutmeg?
No worries at all! You can substitute it with an extra pinch of cinnamon or even use allspice if you have that on hand.
Can I freeze these muffins?
Yes, these freeze wonderfully! Just make sure they are fully cooled, then wrap them tightly in plastic wrap and store in a freezer-safe bag. When you’re ready to enjoy them, just thaw and reheat!
How can I make them healthier?
You can substitute half of the all-purpose flour with whole-wheat flour, and use less sugar if you prefer. They’ll still turn out delicious!
This recipe has become a favorite in my house, and I’m so excited for you to try it. I know you’ll love it as much as I do! When you serve these delicious muffins to your family, watch their faces light up with joy. Let me know how it turns out, and if your family asks for seconds, just like mine does every time! Happy baking!
Pumpkin Muffins
Ingredients
For the Muffins
- 1.5 cups all-purpose flour This is the base of your muffins.
- 1 teaspoon baking powder Essential for giving lift.
- 0.5 teaspoon baking soda Works with the pumpkin to help rise.
- 0.5 teaspoon salt Enhances all flavors.
- 1 teaspoon ground cinnamon Brings out the best in pumpkin.
- 0.5 teaspoon ground nutmeg Adds delightful depth.
- 1 cup pumpkin puree Makes muffins moist and flavorful.
- 2/3 cup granulated sugar Sweetens muffins just right.
- 1/3 cup vegetable oil Makes them soft and moist.
- 2 large eggs Holds everything together.
- 1 teaspoon vanilla extract Adds background flavor.
For the Crumb Topping
- 1/4 cup butter Melted for crumbling on top.
- 1/4 cup brown sugar Adds sweetness and a caramel flavor.
- 1/4 cup flour Helps the topping stick together.
- 1 teaspoon cinnamon Adds additional flavor.
For the Glaze
- 4 tablespoons maple syrup Gives a delicious drizzle.
- 1 teaspoon cinnamon Ties the flavors together.
Instructions
Preparation
- Preheat your oven to 350°F (175°C) and line a muffin tin with paper liners.
- In a large bowl, whisk together the flour, baking powder, baking soda, salt, cinnamon, and nutmeg.
- In another bowl, combine the pumpkin puree, granulated sugar, vegetable oil, eggs, and vanilla. Mix until well blended.
- Gradually add the dry mixture to your wet mixture and fold them together gently.
- Spoon the batter into the muffin tin, filling each cup about two-thirds full.
- In a small bowl, mix together the melted butter, brown sugar, flour, and cinnamon until crumbly. Sprinkle this over the top of each muffin.
- Bake for 20-25 minutes until a toothpick inserted comes out clean.
- While the muffins are baking, whisk together the maple syrup and cinnamon for the glaze.
- Allow the muffins to cool in the tin for about five minutes before transferring to a wire rack.
- Drizzle the glaze over the cooled muffins.
- Serve and enjoy!