I’m thrilled to share with you one of my absolute favorite recipes—Rachel Sandwich. This delightful twist on the classic Reuben is not just a meal; it’s a warm embrace on a plate. I remember the first time I had a Rachel Sandwich; it was a rainy afternoon, and my dear friend Maria invited me over. As the steam rose from her kitchen, the aroma of turkey and tangy coleslaw filled the air, transporting me back to my childhood, where the kitchen was the heart of our home. Food has a way of weaving itself into our memories, doesn’t it?
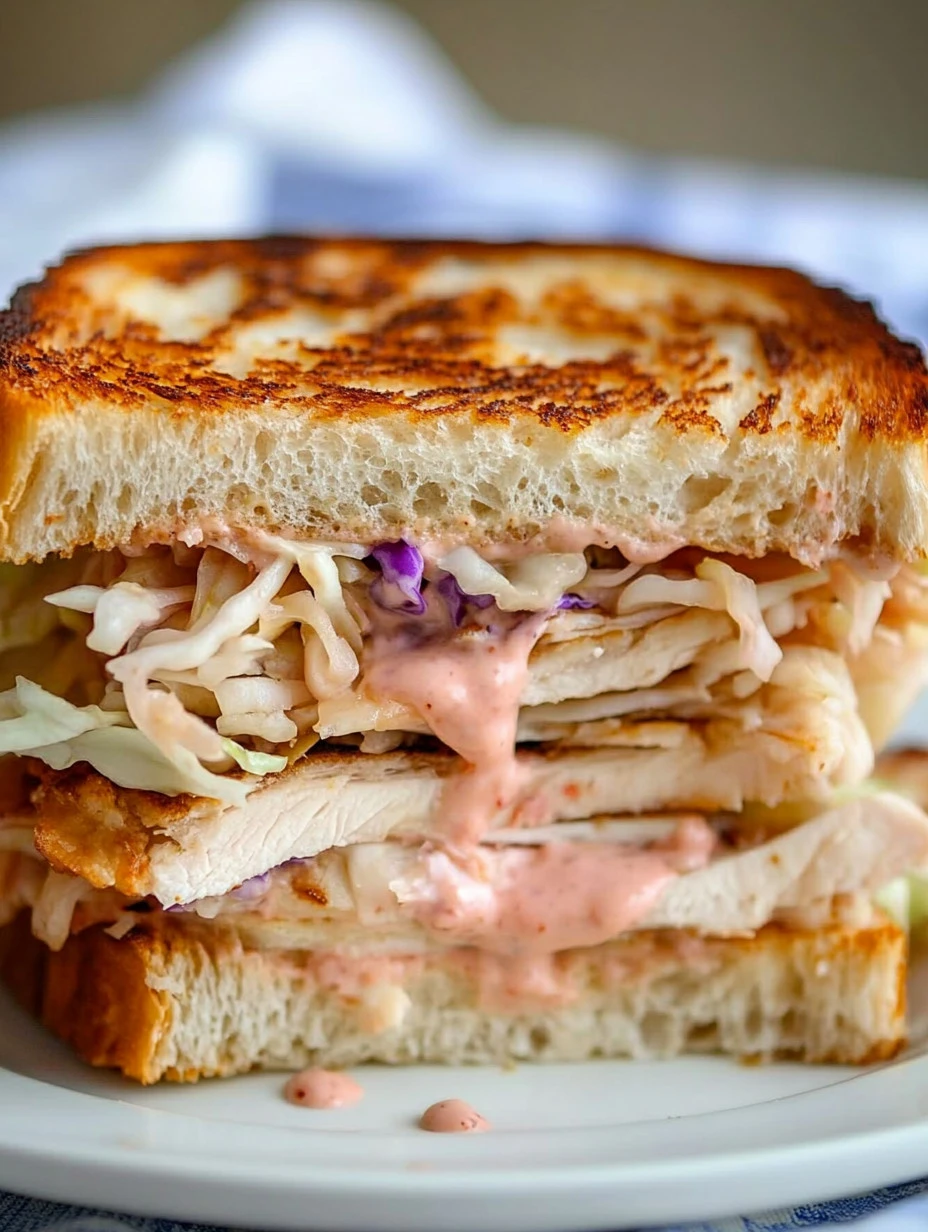
The Rachel Sandwich is packed with layers of flavor that marry beautifully together and bring comfort with each bite. With its perfect balance of turkey, coleslaw, and Swiss cheese nestled between slices of buttery rye bread, it’s a celebration of simple ingredients coming together to create something special. I believe that cooking is a way to nurture both ourselves and our loved ones, and this recipe is my way of connecting with you, my dear reader.
So, if you’re looking to make something memorable for lunch or dinner that will surely please your taste buds, dive right into making a Rachel Sandwich! You’ll be glad you did.
Preparation Process for Rachel Sandwich:
- Total time: 15 minutes
- Difficulty: Easy
- Preparation time: 10 minutes
- Cooking time: 5 minutes
- Cost: Approximately $10
- Servings: 2
- Course: Main dish
- Cuisine: American
- Calories: About 600 per serving
Ingredients for Rachel Sandwich:
- Turkey: A delicious lean protein that makes this sandwich hearty.
- Coleslaw: Adds a crunchy texture and a tangy flavor that brightens the dish.
- Swiss cheese: Gives a creamy, nutty taste that melts beautifully.
- Rye bread: The perfect base with its distinct flavor that pairs well with the other ingredients.
- Russian or Thousand Island dressing: This creamy dressing ties everything together with its zesty flavor.
- Butter: Provides a golden, crispy finish when grilling the sandwich.
Personal Note: When I prepare this sandwich, I love to use fresh coleslaw that I make from scratch. It’s so easy, and the crunch really elevates the flavor!
Steps to Prepare Rachel Sandwich:
Step 1: Prep the Bread
Start by spreading butter on one side of each slice of rye bread. This is going to give your sandwich that wonderful golden-brown crust we all love.
Step 2: Build Your Layers
Now take the unbuttered side of the bread and layer on your turkey generously. Follow that with a hearty portion of coleslaw, and then add as much Swiss cheese as your heart desires.
Step 3: Add the Dressing
Drizzle some Russian or Thousand Island dressing over the cheese. Trust me, this dressing is what makes the sandwich sing!
Step 4: Top It Off
Place another slice of rye bread on top, ensuring the buttered side is facing up.
Step 5: Grill Away
Heat your skillet over medium heat. Once it’s warm, place your sandwich in the skillet and grill it until it’s golden brown. You’ll want to flip it once, and this should take about 3-4 minutes per side.
Step 6: Serve It Up
Once grilled to perfection, remove the sandwich from the heat, cut it in half, and serve it warm. Enjoy each delightful bite!
Why I Love Making This Dish:
There’s something incredibly nostalgic about making a Rachel Sandwich. It reminds me of those cozy days spent with friends and family, sharing stories and laughter over good food. This dish carries the warmth of nostalgia, and every time I prepare it, I think of those precious moments. It’s a simple yet gratifying way to bring people together, and I always find joy in sharing my favorite recipes with you.
What You’ll Need:
- A non-stick skillet or frying pan
- A spatula for flipping
- A butter knife for spreading
Step-by-Step Guide to Preparing Rachel Sandwich:
- First, spread butter on one side of each slice of rye bread. This is crucial for that lovely crispy texture.
- Next, layer the unbuttered side of one slice with turkey, making sure to cover it well.
- Then, top the turkey with coleslaw and Swiss cheese—don’t be shy with the cheese!
- Drizzle your choice of dressing on top of the cheese for a flavor boost.
- Cap everything off with the second slice of rye bread, buttered side up.
- Place your sandwich in the heated skillet and let it grill until golden brown, about 3-4 minutes on each side.
- Finally, slice it in half and serve it warm. Dig in and savor the love that went into making it!
Tips for the Best Results:
One of my favorite tricks is to use a weight on top of the sandwich while it cooks. A heavy skillet or a panini press can help it cook evenly and get that nice crispy crust.
Serving Suggestions:
This sandwich pairs beautifully with a side of sweet potato fries or a simple green salad. I also love serving it with a bowl of warm tomato soup. The combination is simply divine!
What to Serve with Rachel Sandwich:
Consider a light fruit salad or a potato salad on the side for a refreshing contrast. Pickles can add a nice tang as well!
What to Do with Leftovers:
If you have any leftover sandwiches, simply wrap them in foil or place them in an airtight container in the fridge. To reheat, place them back in the skillet for a few minutes on each side, so they warm up perfectly without getting soggy.
(FAQ) Frequently Asked Questions:
-
Can I use different types of bread?
Yes, feel free to experiment! Pumpernickel or whole wheat bread could add a nice twist. -
What other dressings can I use?
If you want to switch things up, try a garlic aioli or even a spicy mustard for added zing. -
Can I make this sandwich ahead of time?
Sure! You can prepare the sandwich and then wrap it tightly in foil. Just grill it right before you serve.
Conclusion:
As I wrap up sharing my beloved Rachel Sandwich recipe with you, I hope you feel the warmth and love that goes into every bite. It’s more than just a meal; it’s a way to connect with those you cherish while making new memories together. So, gather your ingredients, roll up your sleeves, and treat yourself to this delicious sandwich. I promise, once you take that first bite, you’ll understand why it holds a special place in my heart. Enjoy, and happy cooking!

Rachel Sandwich
Ingredients
Main ingredients
- 4 slices Rye bread The perfect base with its distinct flavor.
- 8 oz Turkey A delicious lean protein.
- 1 cup Coleslaw Adds a crunchy texture and tangy flavor.
- 4 slices Swiss cheese Gives a creamy, nutty taste.
- 2 tbsp Russian or Thousand Island dressing Ties everything together.
- 2 tbsp Butter Provides a golden, crispy finish.
Instructions
Preparation
- Spread butter on one side of each slice of rye bread.
- Layer the unbuttered side of one slice with turkey.
- Top the turkey with coleslaw and Swiss cheese.
- Drizzle dressing over the cheese.
- Cap with the second slice of rye bread, buttered side up.
- Heat skillet over medium heat and grill the sandwich until golden brown, about 3-4 minutes on each side.
- Slice in half and serve warm.