
Every time I whip up this Dutch Apple Pie, I’m transported back to my childhood kitchen, where the warm, buttery scent of pie crust mingled with the sweet aroma of cinnamon-spiced apples. I remember the anticipation building as my family gathered around, eager to dig into a slice. It wasn’t just dessert; it was a celebration of family, love, and the simple joys of life. If you’ve ever experienced that magical moment when the first piece is served and all eyes light up, you know exactly what I mean.
You’re in for a treat because this pie is a classic that never goes out of style. It’s the kind of recipe that brings people together, and I can hardly wait for you to try it! So, let’s roll up our sleeves and make a pie that will fill your home with love and warmth.
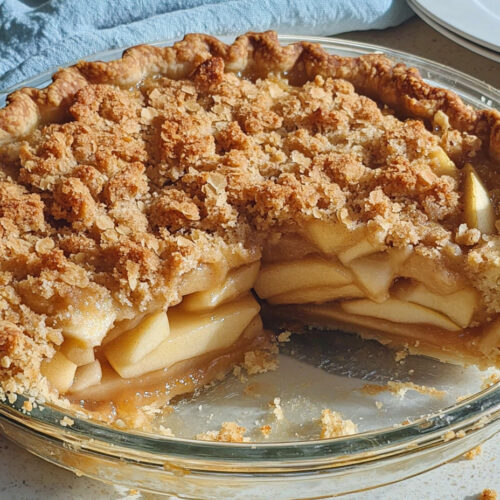
How to make Dutch Apple Pie
Ingredients:
- 2 ½ cups all-purpose flour: This is the foundation for our flaky crust. If you're ever in a pinch, you can use whole wheat flour for a nuttier flavor, but I personally prefer the classic white flour.
- 1 cup unsalted butter, cold and cubed: Cold butter is key to achieving that flaky texture we all love. I like to keep my butter in the freezer for about 15 minutes before cutting it.
- 1 teaspoon salt: Just a pinch enhances all the flavors.
- 1 teaspoon sugar: This is not just any sugar; it helps balance the saltiness in the crust.
- 6 to 8 tablespoons ice water: This is what brings our dough together, and trust me, the colder, the better.
- 6 to 8 medium apples, peeled, cored, and sliced: I adore using a mix of tart apples like Granny Smith and sweeter varieties like Fuji for depth of flavor.
- 1 cup sugar: This will sweeten the apple filling just right!
- 2 tablespoons all-purpose flour: This will help thicken the apple mixture and keep it from getting too runny.
- 1 teaspoon ground cinnamon: Ah, the comforting spice that makes everything better.
- 1 tablespoon lemon juice: A splash of acidity brightens up the sweet apples wonderfully.
- 1 cup rolled oats: These will add a delightful texture to the crumb topping.
- 1 cup brown sugar: This gives the topping a lovely richness.
- 1 teaspoon ground cinnamon: Because one teaspoon wasn’t enough; we really want to taste that cinnamon goodness!
- ½ cup unsalted butter, melted: This binds everything together for that delicious crumb topping.
Cooking Steps
- Preheat your oven to 425°F (220°C). This is key for that crisp crust!
- In a large mixing bowl, combine the flour, salt, and sugar. This initial mixing makes sure everything is evenly distributed.
- Next, cut in the cold, cubed butter until the mixture resembles coarse crumbs. I find using a pastry cutter or two forks works best for ensuring the butter stays nice and cold. Remember, you want those little chunks of butter for flakiness!
- Gradually add the ice water, one tablespoon at a time, mixing just until the dough forms a ball. It’s a bit like coaxing a shy puppy out of its shell—gentle but firm!
- Once combined, wrap your dough in plastic wrap and refrigerate it for at least 1 hour; I often let it chill overnight for even better results.
- While the dough is resting, prepare the filling. In a large bowl, toss your sliced apples with sugar, flour, cinnamon, and lemon juice. The lemon juice keeps the apples from browning and adds a delightful zing.
- Set your apple mixture aside and take your pie dough out of the fridge. Roll it out on a lightly floured surface to fit your pie dish. Don’t worry if it tears a little; rustic is the new perfect!
- Once the dough is in your pie dish, fill it with that beautiful apple mixture.
- Now, for the crumb topping—combine rolled oats, brown sugar, cinnamon, and melted butter in a bowl. Mix until you have a crumbly texture, and then sprinkle it generously over the apples.
- Bake in the preheated oven for 15 minutes at 425°F to get that crust started, then reduce the temperature to 350°F (175°C) and bake for an additional 35 to 45 minutes until the apples are bubbly and the topping is golden brown.
- When the pie is done, let it cool for at least 2 hours before slicing. The filling will set up beautifully, and trust me, you want to avoid a soupy slice!
Why I Love Making This Dish
What makes this Dutch Apple Pie special to me is all the memories tied to it. It’s a recipe that’s been passed down through generations, each family member contributing their own special twist. The laughter shared, the stories exchanged—all while enjoying a slice of this pie—are moments I treasure deeply.
Whether it’s a chilly autumn day, family gatherings during the holidays, or simply treating myself on a Wednesday, this pie feels like a warm hug. It serves as a reminder to slow down, savor life, and appreciate the people around us.
What You’ll Need
- A rolling pin: This will help you roll out that pie crust perfectly.
- A pie dish: Any size will do, but I recommend a deep dish for maximum apple goodness.
- Mixing bowls: Different sizes because we’ll be mixing and tossing ingredients.
- A pastry cutter or your trusty hands: Either will get the job done!
Tips for Perfect Results
- Use cold ingredients: Everything should be cold—your butter, your water, and even your bowls if you can! This is vital for a flaky crust.
- Don’t overmix: When making the dough, mix just until it comes together. Overworking it can lead to a tough crust.
- Let it cool: I know it’s hard to wait, but letting the pie cool ensures it sets up and slices beautifully.
Serving Suggestions and Sides
I love serving my Dutch Apple Pie with a generous scoop of vanilla ice cream or a dollop of whipped cream. The cold creaminess pairs beautifully with the warm spices of the pie! You can also drizzle a bit of caramel sauce over the top if you want to indulge.
Want to make it a special occasion? Serve with a hot cup of coffee or spiced cider on the side. Imagine sitting around with your loved ones, sharing stories over that warm pie—it really doesn’t get any better than that.
Leftovers
If you're lucky enough to have any leftover pie, store it in the refrigerator, covered, for up to 3 days. Reheat slices in the microwave for about 20-30 seconds or pop them in the oven at 350°F (175°C) until warmed through. I love eating it for breakfast with my coffee; it feels like a special treat!
FAQ Section
Can I use other types of apples? Absolutely! I’ve used a mix of Granny Smith, Fuji, and even Honeycrisp. Each variety offers a unique flavor, so feel free to get creative.
What if I don’t have fresh apples? While nothing beats fresh apples for this recipe, you can use canned pie filling in a pinch! Just be sure to skip the sugar in the filling part of the recipe to keep it from getting overly sweet.
Can I freeze the pie? You bet! If you have extra pie, wrap it tightly and freeze it. When you’re ready to enjoy it, bake it from frozen at 350°F (175°C) until heated through, and your home will smell heavenly again!
How long does it take to make this from start to finish? This recipe will take about 2 hours total, but most of that time is just letting the dough chill and the pie cool. Trust me, the wait is worth it!
This Dutch Apple Pie has become a staple in my home, bringing smiles and warmth around the table every time I make it. I hope you give this recipe a try. I know you’ll love it just as much as I do! And when your family asks for seconds—just like mine does every time—I’d love to hear all about it. Enjoy every bite, and happy baking!
Dutch Apple Pie
Ingredients
For the Pie Crust
- 2.5 cups all-purpose flour This is the foundation for our flaky crust.
- 1 cup unsalted butter, cold and cubed Cold butter is key for flakiness.
- 1 teaspoon salt Enhances all flavors.
- 1 teaspoon sugar Balances the saltiness in the crust.
- 6 to 8 tablespoons ice water Cold water helps bring the dough together.
For the Apple Filling
- 6 to 8 medium apples, peeled, cored, and sliced Use a mix of tart and sweet apples for depth of flavor.
- 1 cup sugar Sweetens the apple filling.
- 2 tablespoons all-purpose flour Thickens the apple mixture.
- 1 teaspoon ground cinnamon Adds comforting spice.
- 1 tablespoon lemon juice Brightens up the apples.
For the Crumb Topping
- 1 cup rolled oats Adds delightful texture.
- 1 cup brown sugar Gives topping richness.
- 1 teaspoon ground cinnamon Reinforces cinnamon flavor.
- 0.5 cup unsalted butter, melted Binds the crumb topping together.
Instructions
Preparation
- Preheat your oven to 425°F (220°C).
- In a large mixing bowl, combine the flour, salt, and sugar.
- Cut in the cold, cubed butter until the mixture resembles coarse crumbs.
- Gradually add the ice water, one tablespoon at a time, mixing just until the dough forms a ball.
- Wrap the dough in plastic wrap and refrigerate it for at least 1 hour.
- While the dough is resting, prepare the filling by tossing the sliced apples with sugar, flour, cinnamon, and lemon juice.
Assembly and Baking
- Roll out the pie dough on a lightly floured surface to fit your pie dish.
- Place the dough in your pie dish and fill it with the apple mixture.
- For the crumb topping, combine rolled oats, brown sugar, cinnamon, and melted butter in a bowl.
- Mix until crumbly, then sprinkle generously over the apples.
- Bake in the preheated oven for 15 minutes at 425°F, then reduce the temperature to 350°F (175°C) and bake for an additional 35 to 45 minutes.
- Let the pie cool for at least 2 hours before slicing.