

Granny Squares for Beginners: The Complete Guide
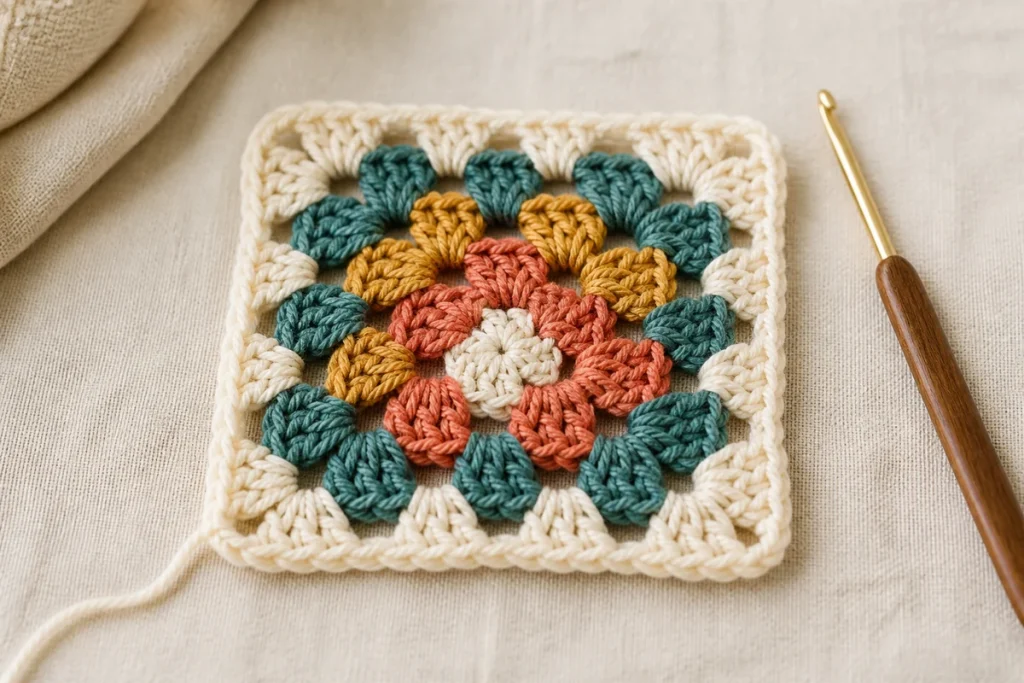
The classic granny square grows from four repeating corners and groups of three U.S. double crochets. Once you can identify a corner space and a side space, the construction becomes predictable.
Materials and pattern terms
Use smooth yarn and a hook that creates flexible, even fabric. For practice, category 4 medium yarn with a hook near the label recommendation makes the spaces easy to see. This guide uses standard U.S. terms:
- ch: chain
- sl st: slip stitch
- dc: double crochet
- cluster: three double crochet stitches worked into the same space
- corner: two clusters separated by a chain space
The starting chains in this teaching pattern count as the first double crochet. If you use another designer’s pattern, follow its convention instead.
Classic granny square: step by step
Round 1
- Make a magic ring, or chain 4 and join with a slip stitch to form a ring.
- Chain 3; this counts as the first double crochet. Work 2 dc into the ring, then chain 2.
- Work 3 dc, ch 2 into the ring three more times.
- Join with a slip stitch to the top of the beginning chain 3. You have four clusters and four corner spaces.
Round 2
- Slip stitch to the next corner space, or fasten off and join a new color in any corner.
- In that corner work: ch 3, 2 dc, ch 2, 3 dc.
- In each remaining corner work: 3 dc, ch 2, 3 dc.
- Join to the top of the beginning chain 3. You have eight clusters.
Round 3 and later
- Begin in a corner and make the first corner as above.
- Work one 3-dc cluster in every side space between corners.
- In every corner, work 3 dc, ch 2, 3 dc.
- Join and repeat. Each additional round has one more side cluster on each side.
Why a granny square stays square
The corner chain spaces supply enough room for the work to turn approximately 90 degrees. If you accidentally place only one cluster in a corner, that corner pulls inward. If you add a second cluster to an ordinary side space, the side may bulge.
Count four corners after every round. Then check that every non-corner space contains exactly one cluster. This visual check is often faster than counting individual stitches.
How to change colors and manage ends
To change color at a round boundary, finish the round, cut the yarn leaving a tail long enough to weave, and fasten off. Join the next color in a corner space. Changing the starting corner from round to round can distribute the small visual seam.
Weave tails through several stitches on the back, reverse direction, and avoid relying on a single knot. Fiber type affects how easily ends move, so leave an adequate tail and inspect the care requirements in the yarn guide.
Block and join granny squares
Blocking helps squares settle into consistent dimensions; it cannot reliably correct major stitch-count errors. Follow the yarn label. Wet blocking suits many washable fibers, while steam can damage or permanently alter heat-sensitive synthetic yarn if applied too closely or hot.
Measure squares against the same template without overstretching. Common joining options include:
- Whip stitch: a sewn join with a visible or nearly invisible ridge depending on placement.
- Mattress-style seam: a flatter sewn join worked through selected loops.
- Slip-stitch join: a crocheted ridge that can become a design feature.
- Single-crochet join: a strong, decorative raised seam.
- Join as you go: connects motifs during the final round and requires planning the assembly order.
Common granny-square mistakes
| Problem | Cause to check | Fix |
|---|---|---|
| Square turns into a pentagon | An extra corner was created in a side space | Undo to the error and restore exactly four corners. |
| Corner pulls inward | Missing cluster or chain space | Each corner needs two clusters with the specified chain space. |
| Square twists | Tension, hook size, or all rounds worked in one direction | Check gauge; some patterns reduce twist by turning rounds. |
| Center hole is too large | Loose chain ring or open magic ring | Tighten a magic ring securely or use a smaller chain loop. |
| Different square sizes | Changed yarn, hook, or tension | Use the same materials and compare gauge before making a full set. |
Frequently asked granny-square questions
How many granny squares do I need for a blanket?
Divide the planned blanket width and length by the blocked square size, then round to whole motifs and account for seam width and border. The blanket sizing guide explains planning dimensions.
Why is my granny square wavy?
Check for extra clusters, loose tension, or a hook that creates overly open fabric. Mild waviness may settle after blocking; major excess stitches must be corrected.
Do I need to chain between side clusters?
Patterns vary. This teaching version uses clusters directly in side spaces and chain 2 at corners. Follow one pattern consistently because changing chain counts changes size and openness.
Can beginners make granny squares?
Yes. Learn chain, slip stitch, and U.S. double crochet first, then mark corners and count clusters each round.
Sources and standards
Technical terminology and sizing were checked against the following references:
