
Amigurumi for Beginners: Supplies, Stitches and First Steps
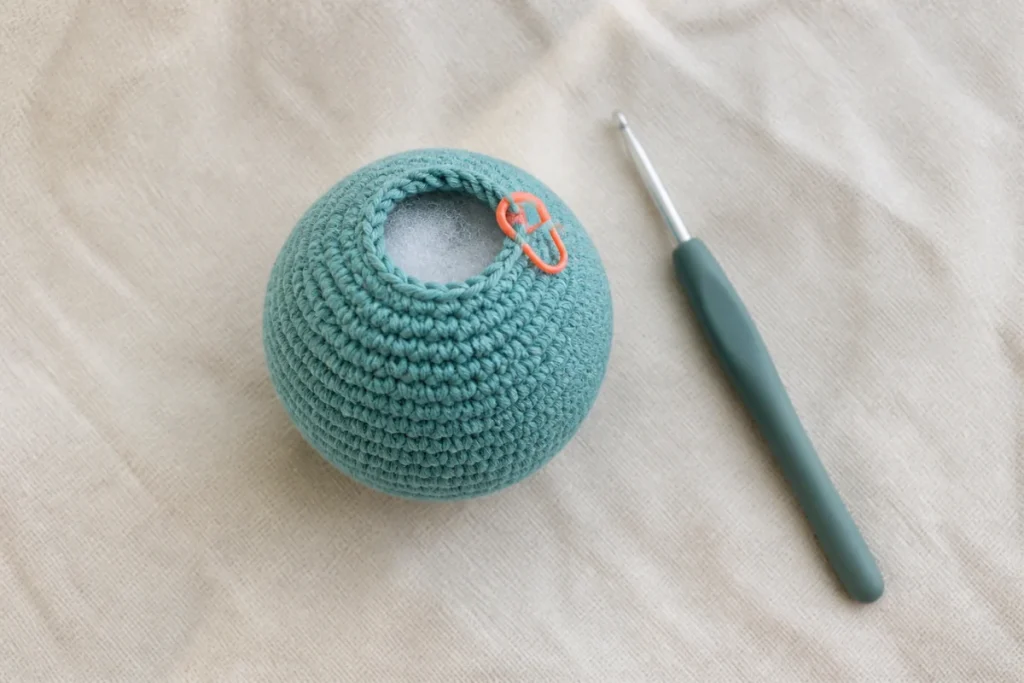
Amigurumi becomes much easier when you understand it as simple shapes built with increases, even rounds, and decreases. Accurate counting and secure finishing matter more than speed.
What is amigurumi?
Amigurumi is the Japanese craft of making small stuffed yarn figures, commonly by crocheting. Most modern crochet amigurumi patterns use U.S. single crochet in continuous spiral rounds. Increases widen a shape, even rounds maintain its circumference, and decreases narrow it.
A simple sphere, tube, and flattened oval teach most of the construction logic used for heads, bodies, limbs, and ears.
Beginner amigurumi supplies
- Smooth yarn: cotton, acrylic, or a blend with clear stitch definition is easier to count than fuzzy yarn.
- Crochet hook: choose a size that creates dense fabric without painful effort. It is often smaller than the yarn label’s general suggestion, but your swatch decides.
- Locking stitch marker: mark the first stitch of every continuous round.
- Yarn needle: use it for assembly and secure finishing.
- Washable stuffing: add small pieces gradually for an even shape.
- Embroidery yarn or thread: useful for facial details.
- Optional pins: position parts before sewing; remove every pin before the item is handled.
Review yarn weight and hook size if you substitute materials. A change in either can change the toy’s finished dimensions.
Five essential amigurumi techniques
- Magic ring: creates an adjustable center. Work stitches over the ring and tail, then close and secure the center. A chain start is a valid alternative when the pattern permits.
- Single crochet: creates the dense base fabric. Learn its anatomy in the beginner stitch guide.
- Increase: work two single crochets in one stitch to add one stitch.
- Invisible decrease: insert through the front loops of the next two stitches, yarn over and pull through both front loops, then complete a single crochet. Follow the pattern if it defines another decrease.
- Continuous-round counting: mark the first stitch and move the marker every round. Learn the full method in crochet in the round.
How basic amigurumi shapes are built
A common single-crochet sphere begins with evenly spaced increases: 6 stitches, then 12, 18, 24, and so on. Several rounds without increases form the middle. Evenly spaced decreases mirror the increase section to close the shape.
Those numbers are a common structure, not a universal formula. The desired proportion, yarn, hook, and designer’s shaping may use different counts. Always preserve the stitch total stated at the end of the round.
| Instruction | Effect | Counting check |
|---|---|---|
| Increase evenly | Shape becomes wider | New total equals old total plus the number of increases |
| Work even | Maintains circumference and adds height | Total stays unchanged |
| Decrease evenly | Shape narrows | New total equals old total minus the number of decreases |
Stuffing, positioning, and assembly
Add small pieces of stuffing rather than one large wad. Use enough to support the shape while keeping the stitches from stretching into visible gaps. Add stuffing before the opening becomes too small, then use a blunt tool carefully to adjust it.
Pin parts in place and view the figure from the front, side, and top before sewing. Use the long yarn tail specified by the pattern. Sew through substantial stitch loops on both pieces, tighten evenly, knot or secure according to the construction, and bury the tail inside.
Safety considerations for crocheted toys
Buttons, beads, bells, and plastic “safety eyes” are small components; the name does not guarantee that an eye can never detach. For items intended for children under age 3, U.S. Consumer Product Safety Commission requirements prohibit small parts in covered products because of choking risk. Embroidered features avoid detachable eye and nose components, but the complete toy—including seams, yarn, stuffing access, trims, and wash durability—still needs to suit its intended user.
If you make toys for sale, gifting, or public use, research the current product-safety, labeling, testing, and age-grading rules for your location and market. A craft tutorial is not a substitute for regulatory compliance.
Common beginner amigurumi mistakes
| Problem | Likely cause | Correction |
|---|---|---|
| Stuffing shows | Hook is too large, tension is loose, or piece is overstuffed | Make a denser swatch or reduce stuffing pressure. |
| Shape leans or becomes uneven | Missed increases/decreases or lost round start | Mark the first stitch and verify every round total. |
| Decrease leaves a gap | Standard decrease or loose loops | Use the defined invisible decrease and keep loops even. |
| Part is the wrong size | Different yarn, hook, or gauge | Compare materials and make a gauge sample. |
| Attached limb twists | Position was not checked from multiple angles | Pin both sides symmetrically before sewing. |
Frequently asked amigurumi questions
What is the best yarn for beginner amigurumi?
Smooth cotton, acrylic, or a blend in a light or medium color makes stitches visible. Choose a weight supported by the pattern and avoid fuzzy yarn for the first project.
Why is amigurumi worked with a smaller hook?
A smaller hook often creates fabric dense enough to hold stuffing. The correct size is the one that creates closed, manageable stitches without straining your hands.
Do I join each amigurumi round?
Many patterns use continuous spirals, but some use joined rounds. Follow the pattern and use a marker for continuous rounds.
Are plastic safety eyes safe for babies?
They are detachable small components and should not be assumed safe for children under 3. Use embroidered details and follow all current product-safety requirements for the intended age and market.
Sources and standards
Technical terminology and sizing were checked against the following references:


