
How to Crochet for Beginners: A Complete Step-by-Step Guide
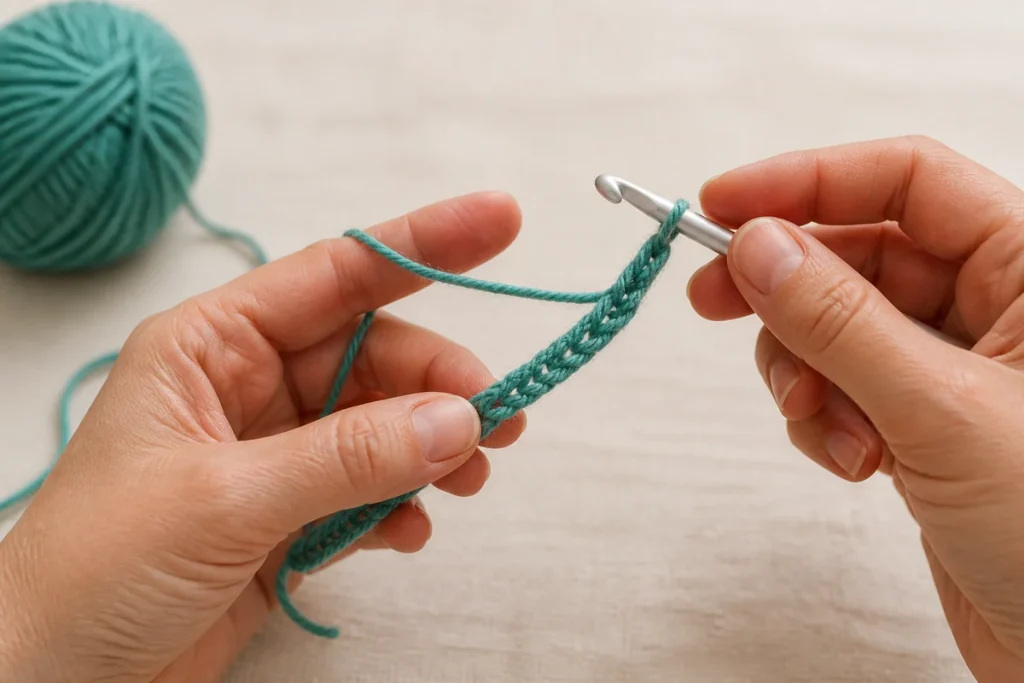
Crochet is made by drawing loops of yarn through other loops with a hook. Start with four basic tools and one simple stitch; accuracy and comfort matter more than speed.
What you need to start crocheting
You do not need a large kit. A smooth, light-colored yarn makes it easier to see each loop, and a medium yarn is generally easier to control than very thin thread or very bulky novelty yarn. Check the yarn label for its weight category and suggested hook range, then treat that suggestion as a starting point rather than a rule.
- Yarn: one ball of smooth category 4 medium yarn, often labeled worsted, aran, or medium.
- Hook: use the size suggested on the label; a 5 mm or 5.5 mm hook is a practical practice size for many medium yarns.
- Scissors: any small, sharp pair reserved for yarn is fine.
- Yarn needle: choose a blunt needle with an eye large enough for your yarn.
- Optional stitch markers: locking markers or small safety-pin-style markers help identify the first and last stitch.
If your label is confusing, use the detailed guides to yarn weights and crochet hook sizes.
Understand the working loop, yarn over, and stitch
The loop currently on your hook is the working loop. It is not normally counted as a stitch. The strand leading from that loop to the ball is the working yarn. To yarn over, bring the yarn over the hook so the hook can catch it and draw it through a loop.
Most crochet stitches are built by inserting the hook into a specified place, yarning over, pulling up a loop, and drawing yarn through one or more loops. The exact number and order of those actions create different stitch heights.
Make a slip knot and foundation chain
1. Put a slip knot on the hook
- Leave a tail about 6 inches long and make a loop with the yarn.
- Pull a bight of the working yarn through that loop.
- Place the new adjustable loop on the hook and tighten it gently. The hook should slide without the loop falling open.
The slip knot itself usually does not count as a chain stitch.
2. Crochet a chain
- Hold the knot below the hook to steady it.
- Yarn over and pull that strand through the working loop. One chain is made.
- Repeat while keeping each new loop large enough for the hook shaft to pass through comfortably.
The front of a chain looks like a row of V shapes. The back has small horizontal bumps. Patterns may tell you which strand to use; if they do not, follow the designer’s stated convention or use the top loops consistently.
Make a single-crochet practice swatch
These instructions use standard U.S. terms. Chain 16. For a basic practice row, insert the hook into the second chain from the hook. The loop on the hook is never counted as a chain.
- Insert the hook into the second chain from the hook.
- Yarn over and pull up a loop. You now have two loops on the hook.
- Yarn over and pull through both loops. One single crochet is complete.
- Repeat in each chain across. You should have 15 stitches.
- Chain 1 and turn the work. Unless a pattern says otherwise, this turning chain usually does not count as a single crochet.
- For the next row, insert under both top loops of the first stitch, then single crochet in every stitch across.
Count your stitches at the end of every row. Place a marker in the first and last stitch until you can recognize the edges. For the anatomy and height of other stitches, open the beginner crochet stitch library.
Tension, posture, and common beginner problems
Tension is how tightly the yarn travels through your hands and around the hook. There is no single correct way to hold yarn or a hook. Use a grip that lets your hands stay relaxed and keeps the loops consistent.
| Problem | Likely cause | What to try |
|---|---|---|
| The hook will not enter a chain | Foundation chain is too tight | Relax the working yarn, make chains on the hook shaft, or use a slightly larger hook for the chain only. |
| Rows keep getting narrower | The last stitch is being skipped | Count every row and mark both edge stitches. |
| Rows keep getting wider | Extra stitches are worked into the turning chain or edge | Identify the first real stitch before beginning the row and recount. |
| Fabric is stiff | Loops are too tight or hook is too small | Relax your grip or test a larger hook. |
| Hands hurt quickly | Grip is too tight or session is too long | Stop, stretch gently, and return for a short session. Persistent pain is a reason to rest and seek professional advice. |
Choose a first project that teaches one new skill
A practice square, cotton dishcloth, simple scarf, or small cowl lets you repeat one stitch without complicated shaping. Read the full materials list before you begin. A suitable first pattern states whether it uses U.S. or U.K. terminology, provides a gauge when finished size matters, explains special stitches, and gives stitch counts.
Before making fitted clothing or a size-sensitive blanket, learn how to read a crochet pattern and how to check crochet gauge. If motifs appeal to you, a classic granny square is a useful next lesson.
Frequently asked beginner questions
Is crochet hard to learn?
The first few sessions can feel awkward because both hands are learning new jobs. Most beginners make faster progress by practicing short chains and rows, counting often, and learning one stitch at a time.
Which crochet hook is best for a beginner?
A smooth aluminum or ergonomic hook in the size suggested for a medium, light-colored yarn is a practical choice. The best handle shape is the one that stays comfortable in your hand.
Should I learn U.S. or U.K. crochet terms?
Learn the terminology used by your chosen pattern source. The same stitch names can mean different stitches in the two systems, so always check the pattern’s terminology note.
How long should I practice?
Ten to twenty focused minutes can be more useful than a long session with tired hands. Stop if you feel pain, numbness, or strain.
Sources and standards
Technical terminology and sizing were checked against the following references:


