
How to Crochet in the Round: Magic Ring, Joining and Increases
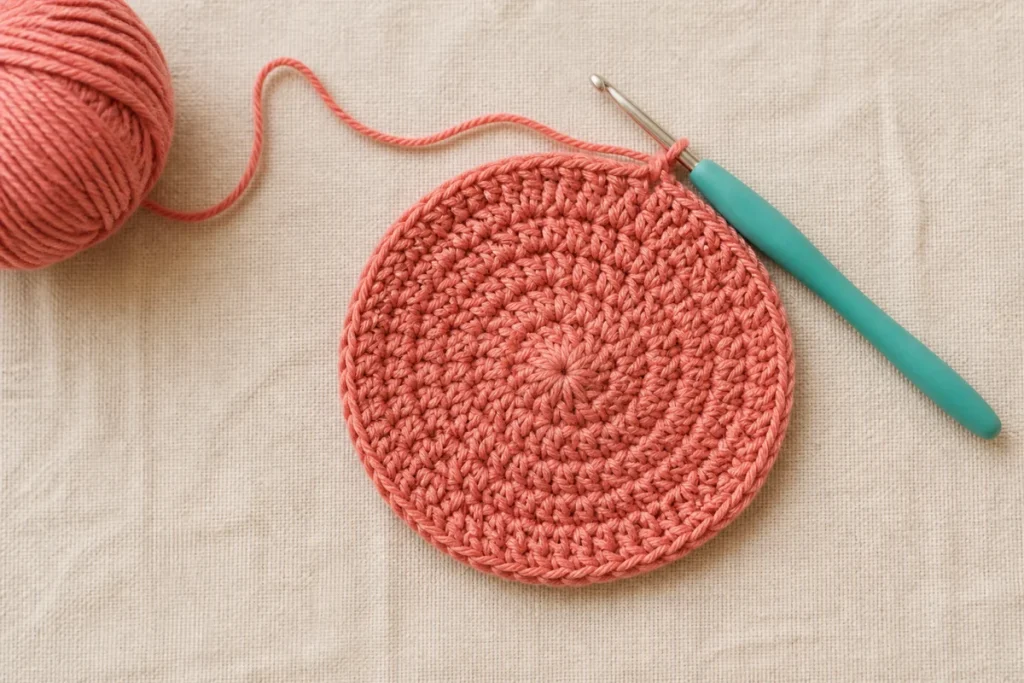
Working in rounds lets crochet grow outward into circles, tubes, toys, hats, and motifs. A secure center, a clear round marker, and accurate increase spacing are the foundations.
Two ways to start crochet in the round
Magic ring (adjustable ring)
- Wrap the yarn to form a loose ring, leaving a tail several inches long.
- Insert the hook through the ring, catch the working yarn, and pull up a loop.
- Make the starting chain required for your stitch and pattern.
- Work the first-round stitches around both the ring and tail.
- Pull the tail steadily to close the center. Secure and weave the tail according to the project; do not cut it short.
The magic ring creates an adjustable center, which is valuable for amigurumi and closed motifs.
Chain ring
Chain the number stated in the pattern, join the first and last chain with a slip stitch without twisting, then work into the center. Another common compact start is to chain 2 and work the first-round stitches into the second chain from the hook. A chain start is stable and can be easier to learn, but it may leave a visible center opening.
Joined rounds versus continuous rounds
| Method | How it works | Best suited to | Watch for |
|---|---|---|---|
| Joined rounds | Each round ends with a slip stitch to a stated stitch or chain; the next round begins with chains or a standing stitch. | Motifs, stripes, and rounds that need a clear boundary | Visible seam, accidental stitch in the join, and whether the starting chain counts |
| Continuous rounds | The first stitch of the next round follows the last stitch without a join. | Amigurumi and smooth spirals | Losing the round start and uneven color-change steps |
Do not switch methods mid-pattern unless you understand how it affects stitch count, seam position, and shaping.
How increases build a flat crochet circle
A circle grows by adding stitches around its circumference. For a common single-crochet circle, a designer may begin with 6 stitches and add 6 stitches per round: 6, 12, 18, 24, 30, and so on. In round 3, that often means 1 sc, increase repeated; in round 4, 2 sc, increase repeated.
This is a useful structure, not a universal law. Taller stitches usually need more starting stitches, and yarn, hook, and individual tension affect the result. Follow the pattern’s count first.
To make increases less visible, stagger their positions rather than stacking them in straight lines, while preserving the same total count.
Use markers to count rounds correctly
In continuous rounds, place a locking marker in the first stitch and move it into the new first stitch every round. Count before moving on. A running scrap-yarn marker woven back and forth at the round boundary creates a visible history that is easy to remove.
In joined rounds, identify whether the starting chain counts as a stitch. Join only to the point named in the pattern. Working into a slip-stitch join by mistake creates an extra stitch.
Why a circle cups or ruffles
| Shape | Likely reason | Adjustment to test |
|---|---|---|
| Cups upward | Too few increases, tight gauge, or a smaller effective hook | Add increases evenly if designing your own circle, or correct gauge if following a pattern. |
| Ruffles or waves | Too many increases, loose gauge, or a larger effective hook | Use fewer increases in a self-designed circle, or correct gauge. |
| Looks polygonal | Increases stack in the same positions | Stagger increase placement while retaining the round total. |
| Center opens | Ring was not fully closed or tail is insecure | Retighten before weaving securely; use a smaller chain start if appropriate. |
Neater joins and color changes
Keep slip-stitch joins snug but not tight enough to pull the edge inward. For a new color in joined rounds, fasten off and begin in a different location when the pattern allows; this avoids a stack of ends and makes the seam less dominant. In a spiral, color changes naturally create a step because the round has no level boundary. Techniques such as a jogless change can soften it, but the exact method depends on the stitch and project.
For square motifs worked outward from the center, continue with the granny-square guide.
Frequently asked round questions
Does the chain at the beginning count as a stitch?
Only if the pattern says or clearly treats it as one. Conventions differ, so the stated stitch count and joining point are decisive.
Why does my seam lean?
Crochet stitches naturally shift, and joining conventions can emphasize that movement. Carefully joining to the stated stitch and counting every round prevents accidental drift, though some diagonal movement can remain.
Can I use a magic ring for every round project?
Use it where an adjustable closed center is appropriate. A chain ring may be structurally or visually preferable for lace, handles, or motifs that need an opening.
How many increases make a flat circle?
The required number depends on stitch height, yarn, hook, and tension. Six per round is a common single-crochet starting structure; follow the pattern and let the fabric show whether adjustment is needed.
Sources and standards
Technical terminology and sizing were checked against the following references:


